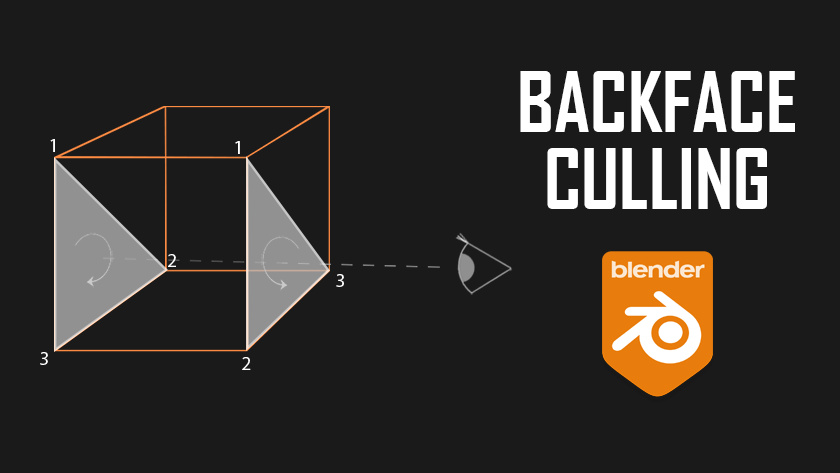
Backface Culling in Blender
There are basically two different approaches to building walls, ceilings and floors. One method of creating walls is to give the wall a thickness of, say, 30 cm at the start. This method is probably the most common and has a lot to do with the perception of our environment.
The second approach to creating walls is more reduced, but no less effective. Basically, the wall is just drawn up as a surface, without wall thickness. This method is often used for interior scenes. As it is irrelevant for the scene whether the wall has a wall thickness and it also saves time. This second approach tends to be used by advanced ArchViz artists, as they usually already know pretty much exactly what will be visible afterwards or already have a more precise idea of what they want to produce and present.
The method you use to create your walls is up to you, as there is no right or wrong way. What can be a bit annoying in any case, however, is the fact that if you want to place various pieces of furniture in the room itself or install skirting boards or generally have to move around the room, your view is blocked by walls or the ceiling. It is precisely for such cases that there is a term in the 3D field that some of you may have already read or heard of: „backface culling“.
This function is available in almost every 3D software, in some applications it is a little more hidden and in others a little easier to access. Today I would like to show you how to use this function in Blender.
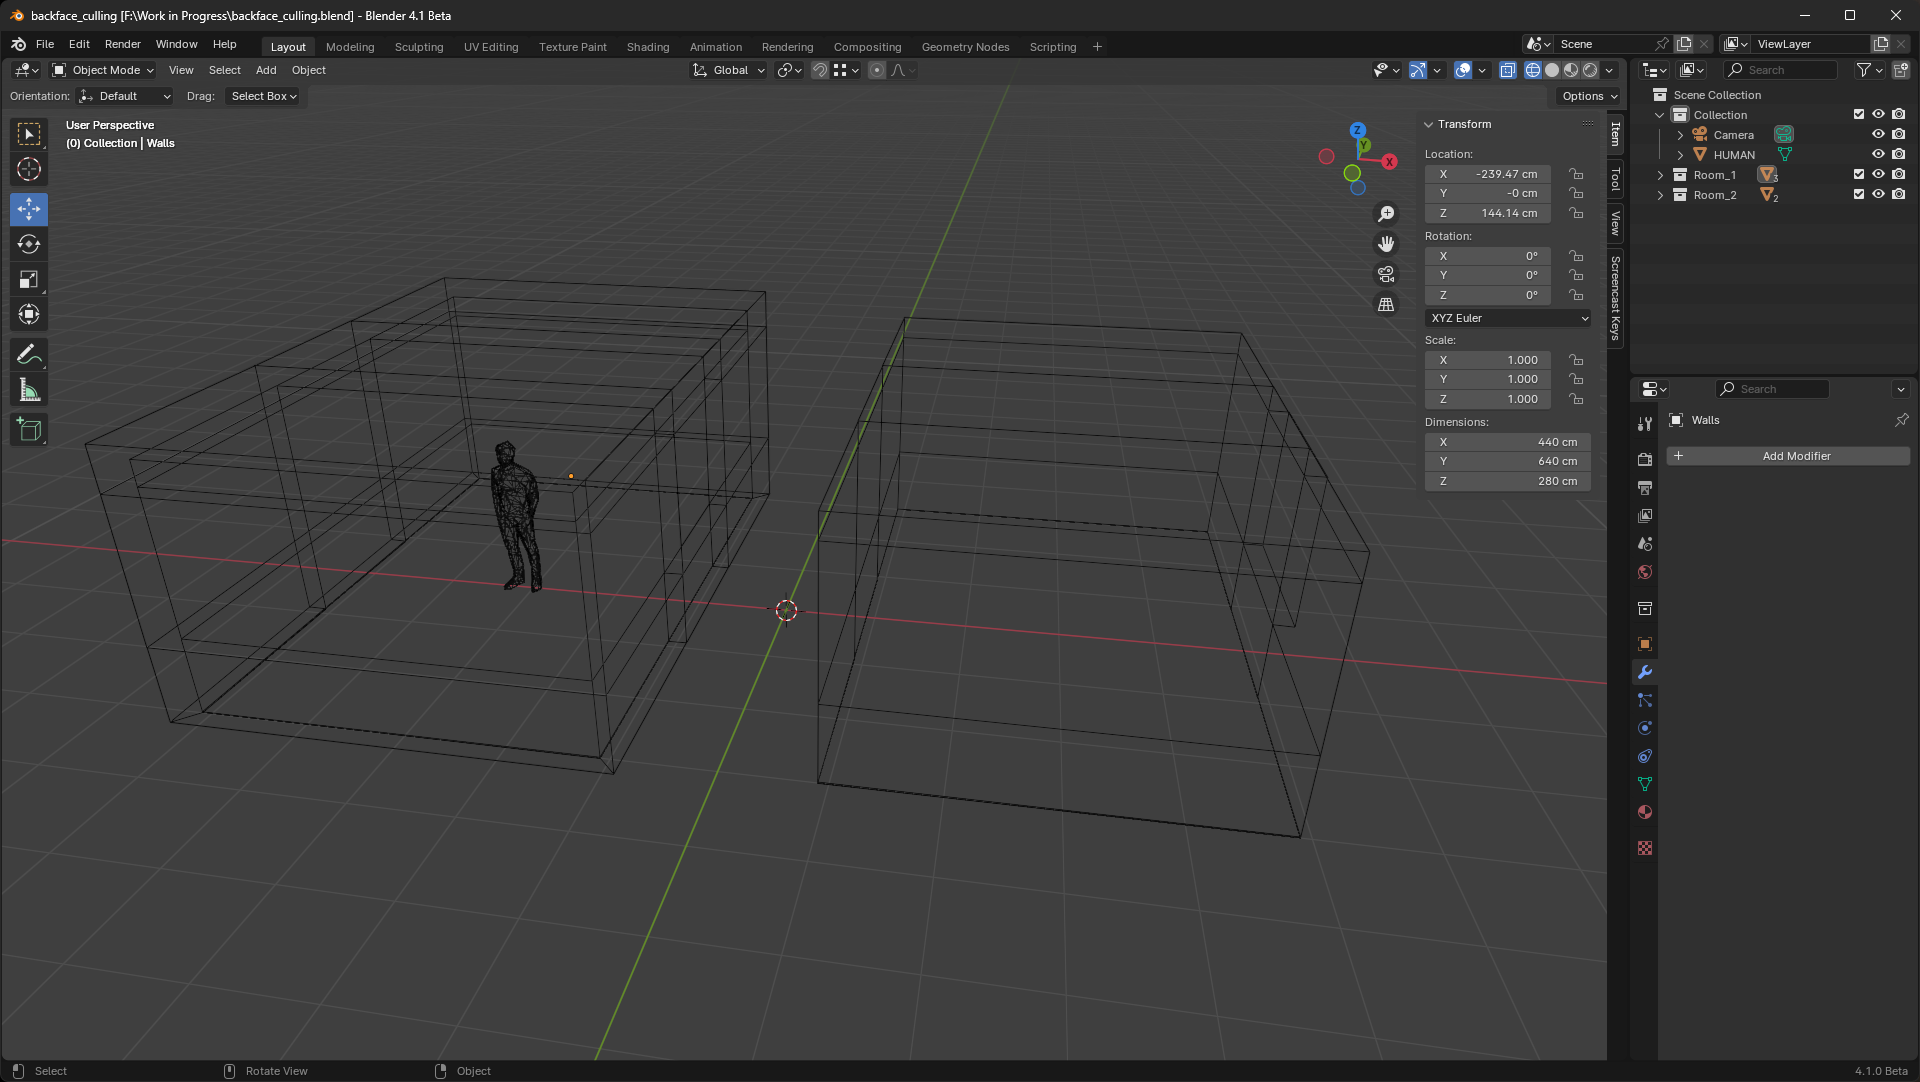
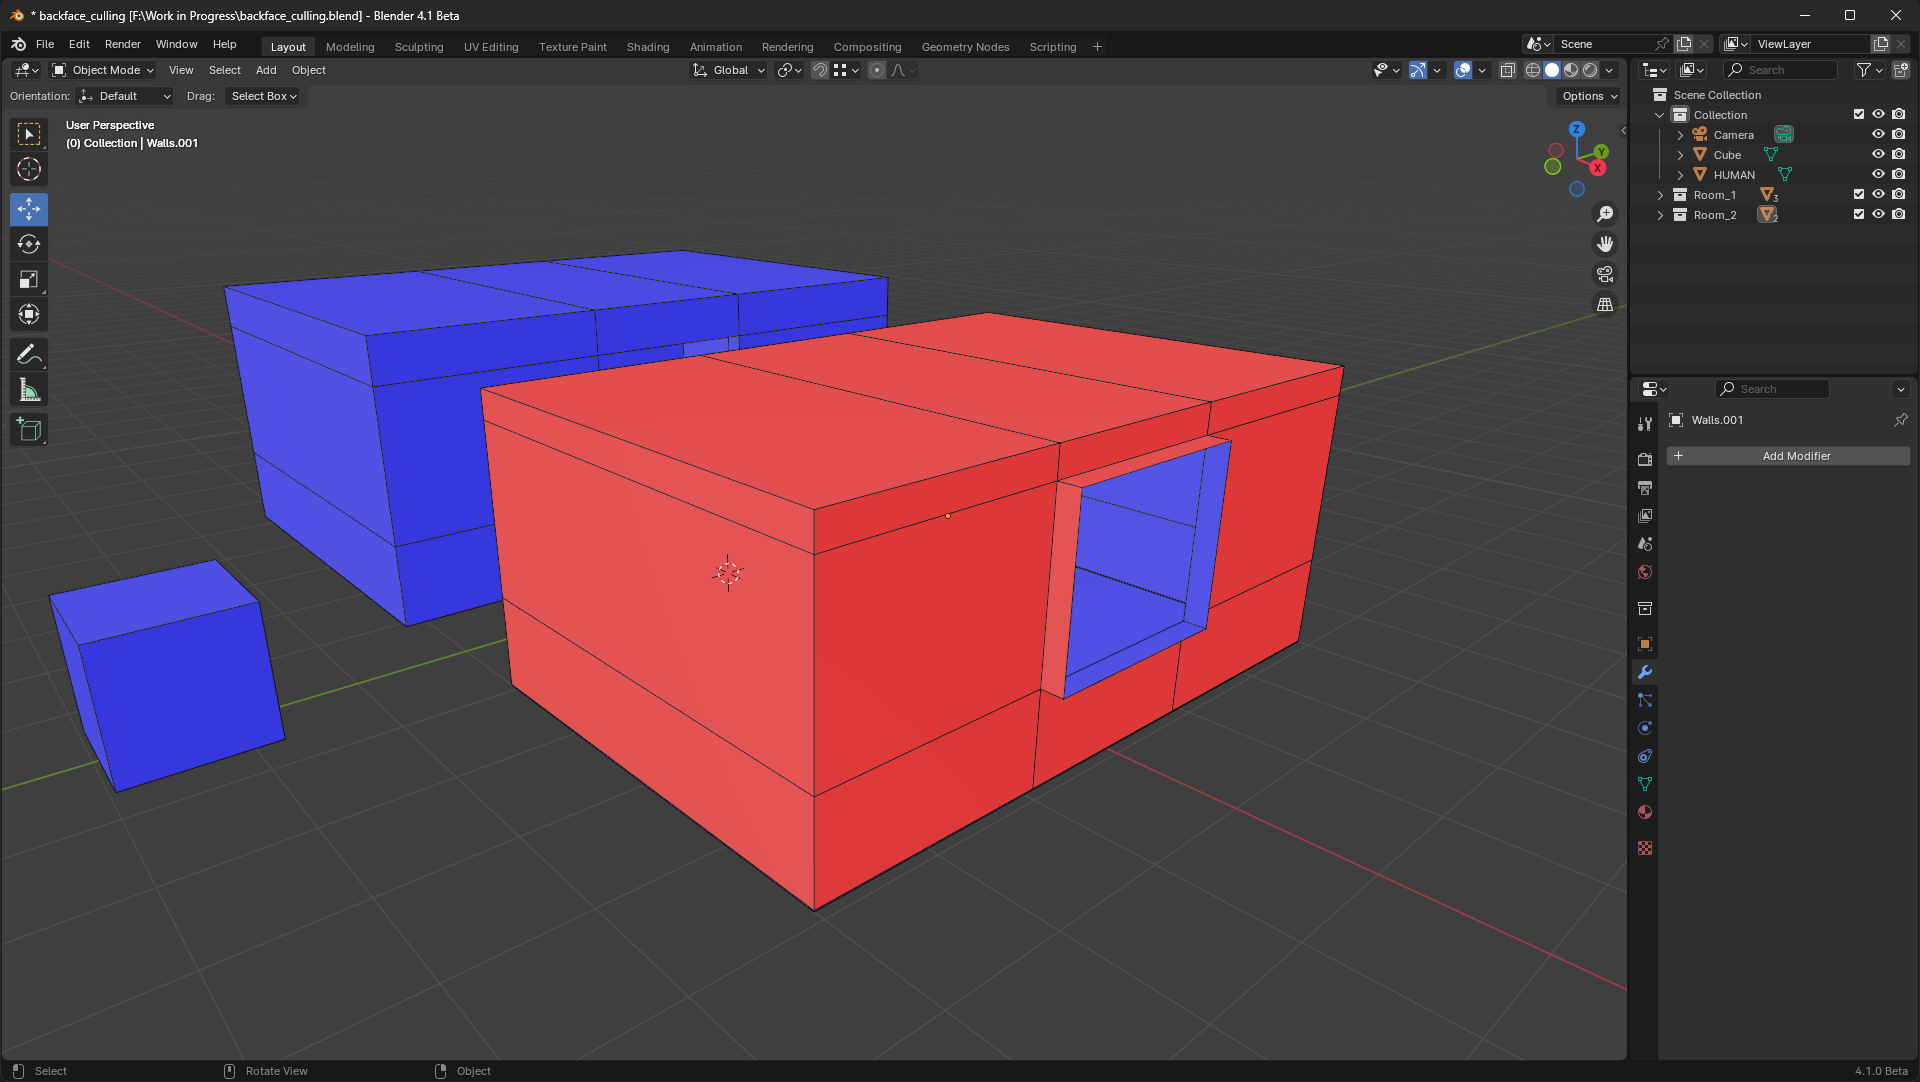
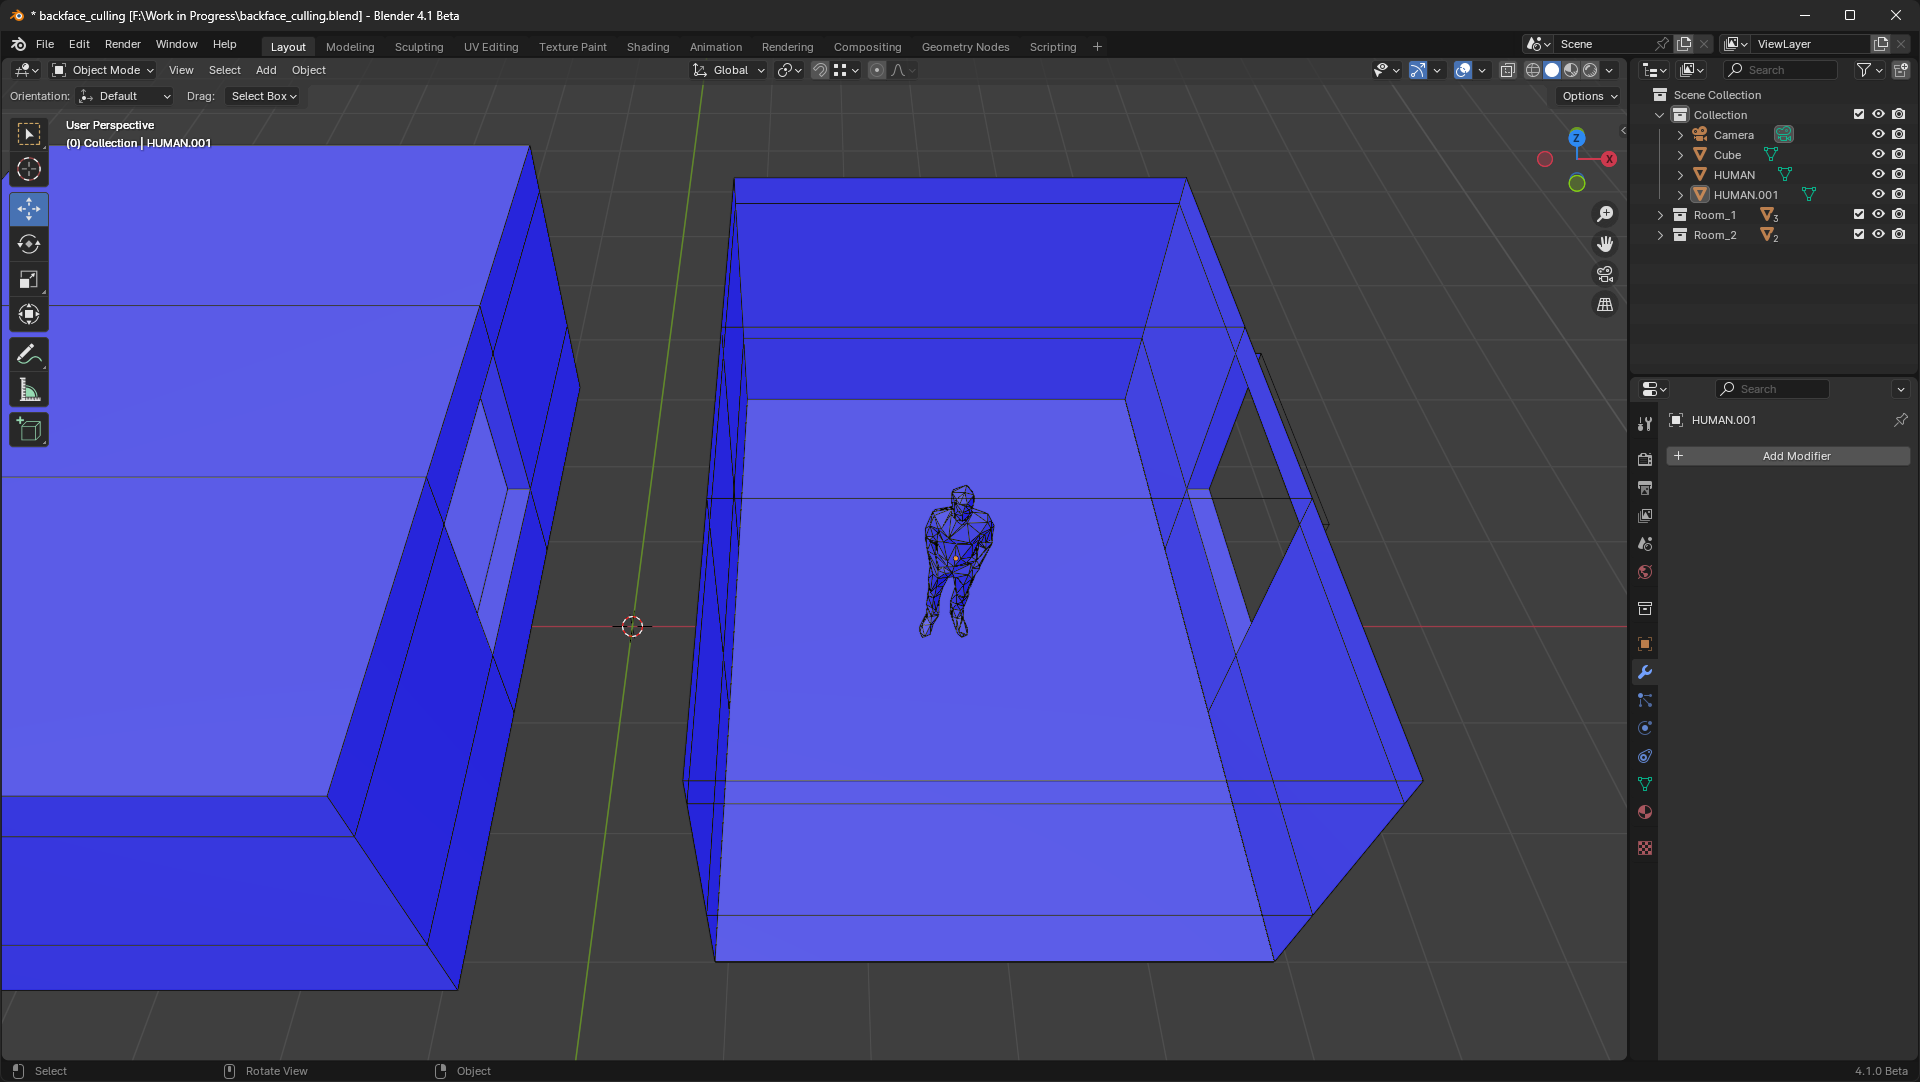
I have a small scene here with two rooms, one room was created with a fixed wall thickness and in the other room the wall and ceiling only exist as a surface. In order to be able to place various objects or model other elements in both rooms, most people would logically deactivate the wall or ceiling in the „Outliner“ so that they don’t have to constantly zoom into the room. Although logical, in my opinion it is rather annoying to constantly deactivate or activate the wall layer, which is unnecessary and tedious.
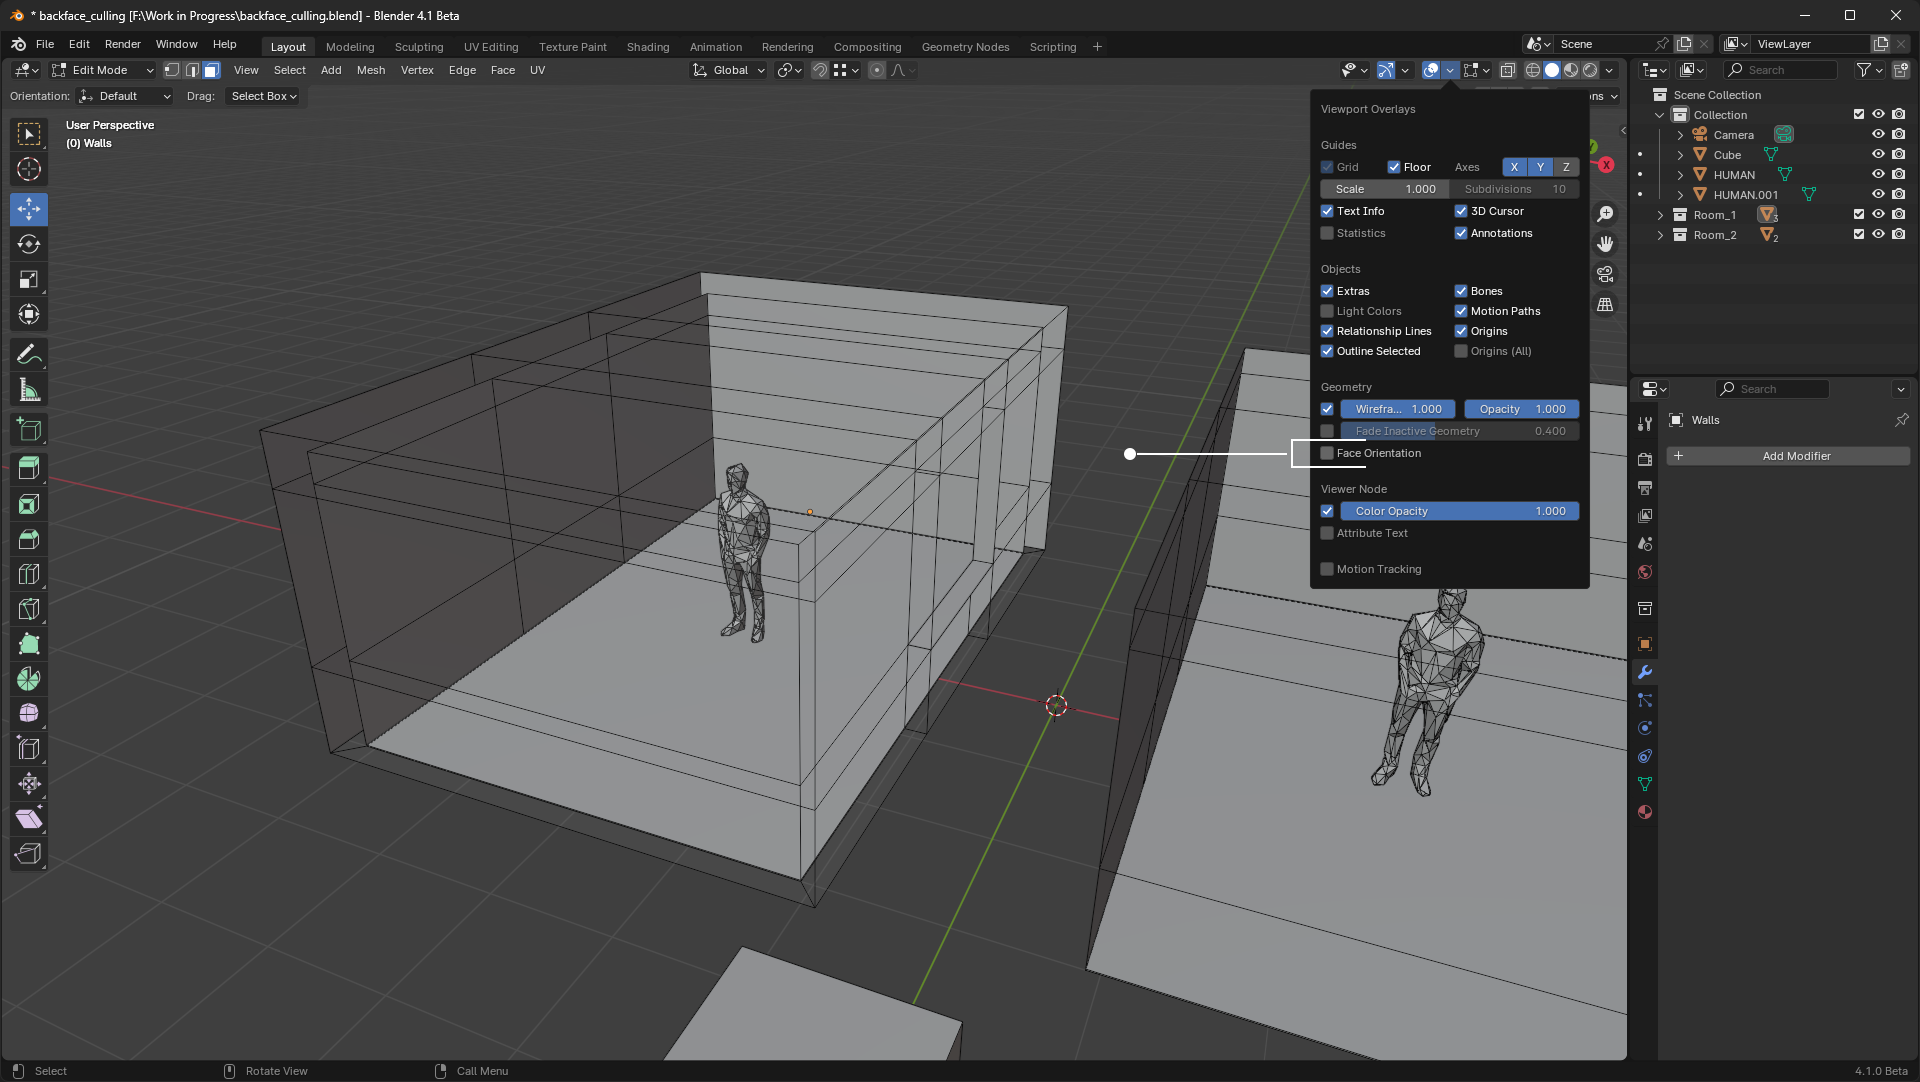
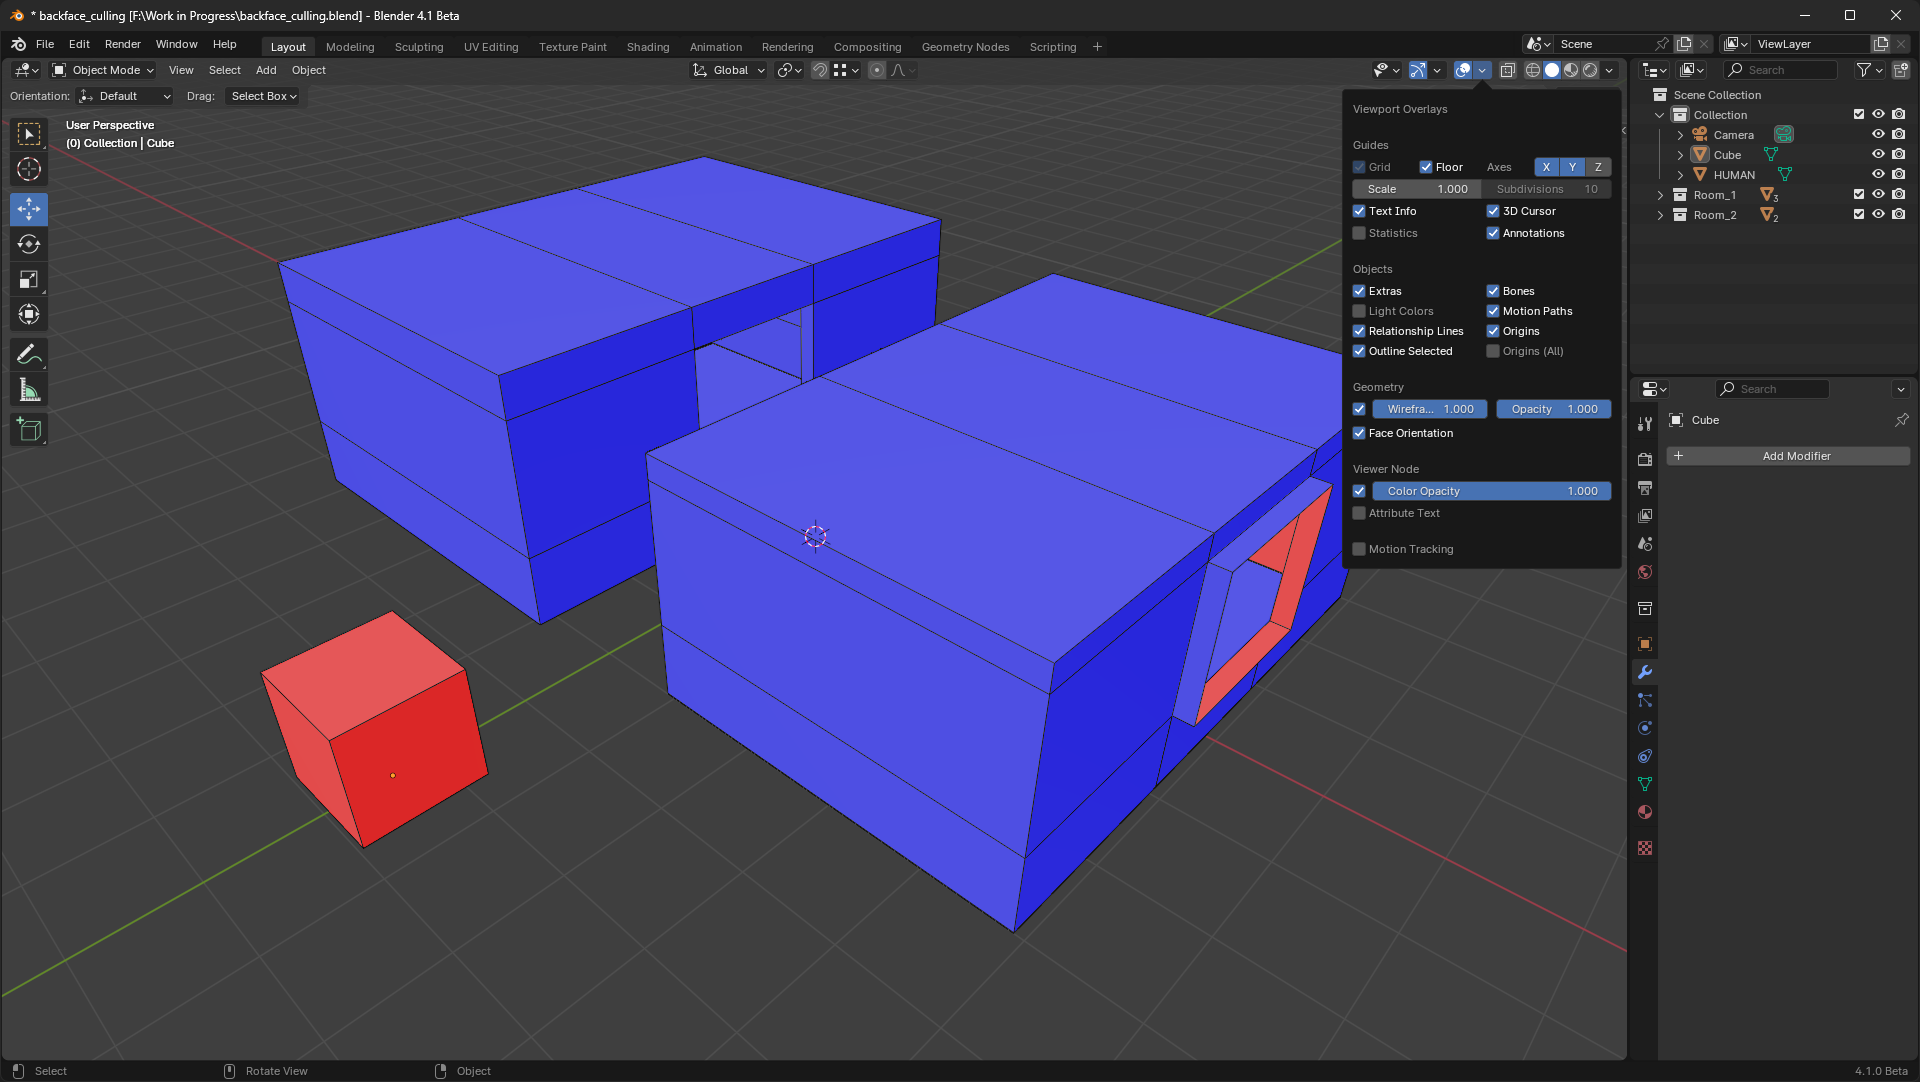
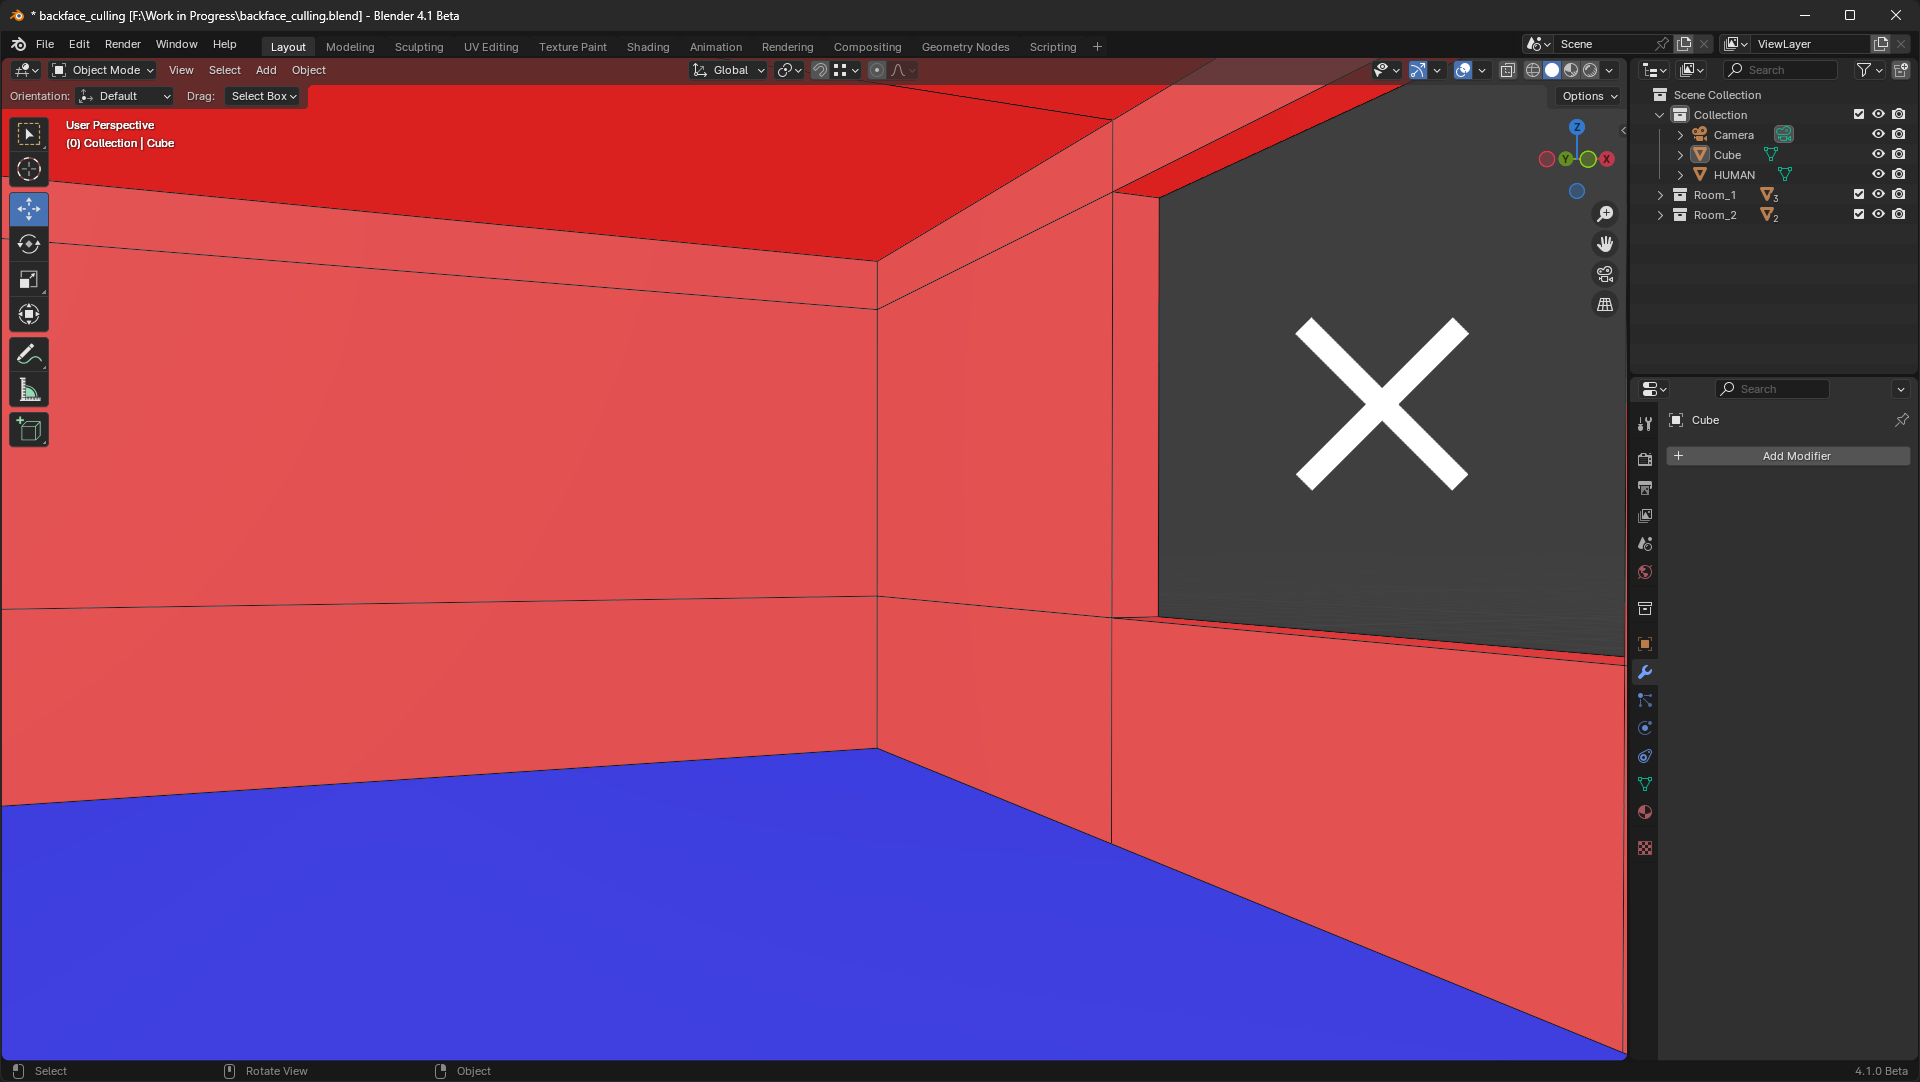
First, check whether the „normals“ are correctly aligned on your surfaces. The „normals“ are an important component, e.g. for the later texturing, but also for the surface texture. But I will deal with these topics separately in another article or video. For now, it is sufficient to check whether your „normals“ are correctly aligned by clicking on the „Overlays“ in the top right of the viewport and selecting „Face Orientation“. Your objects are then usually displayed in two colors.
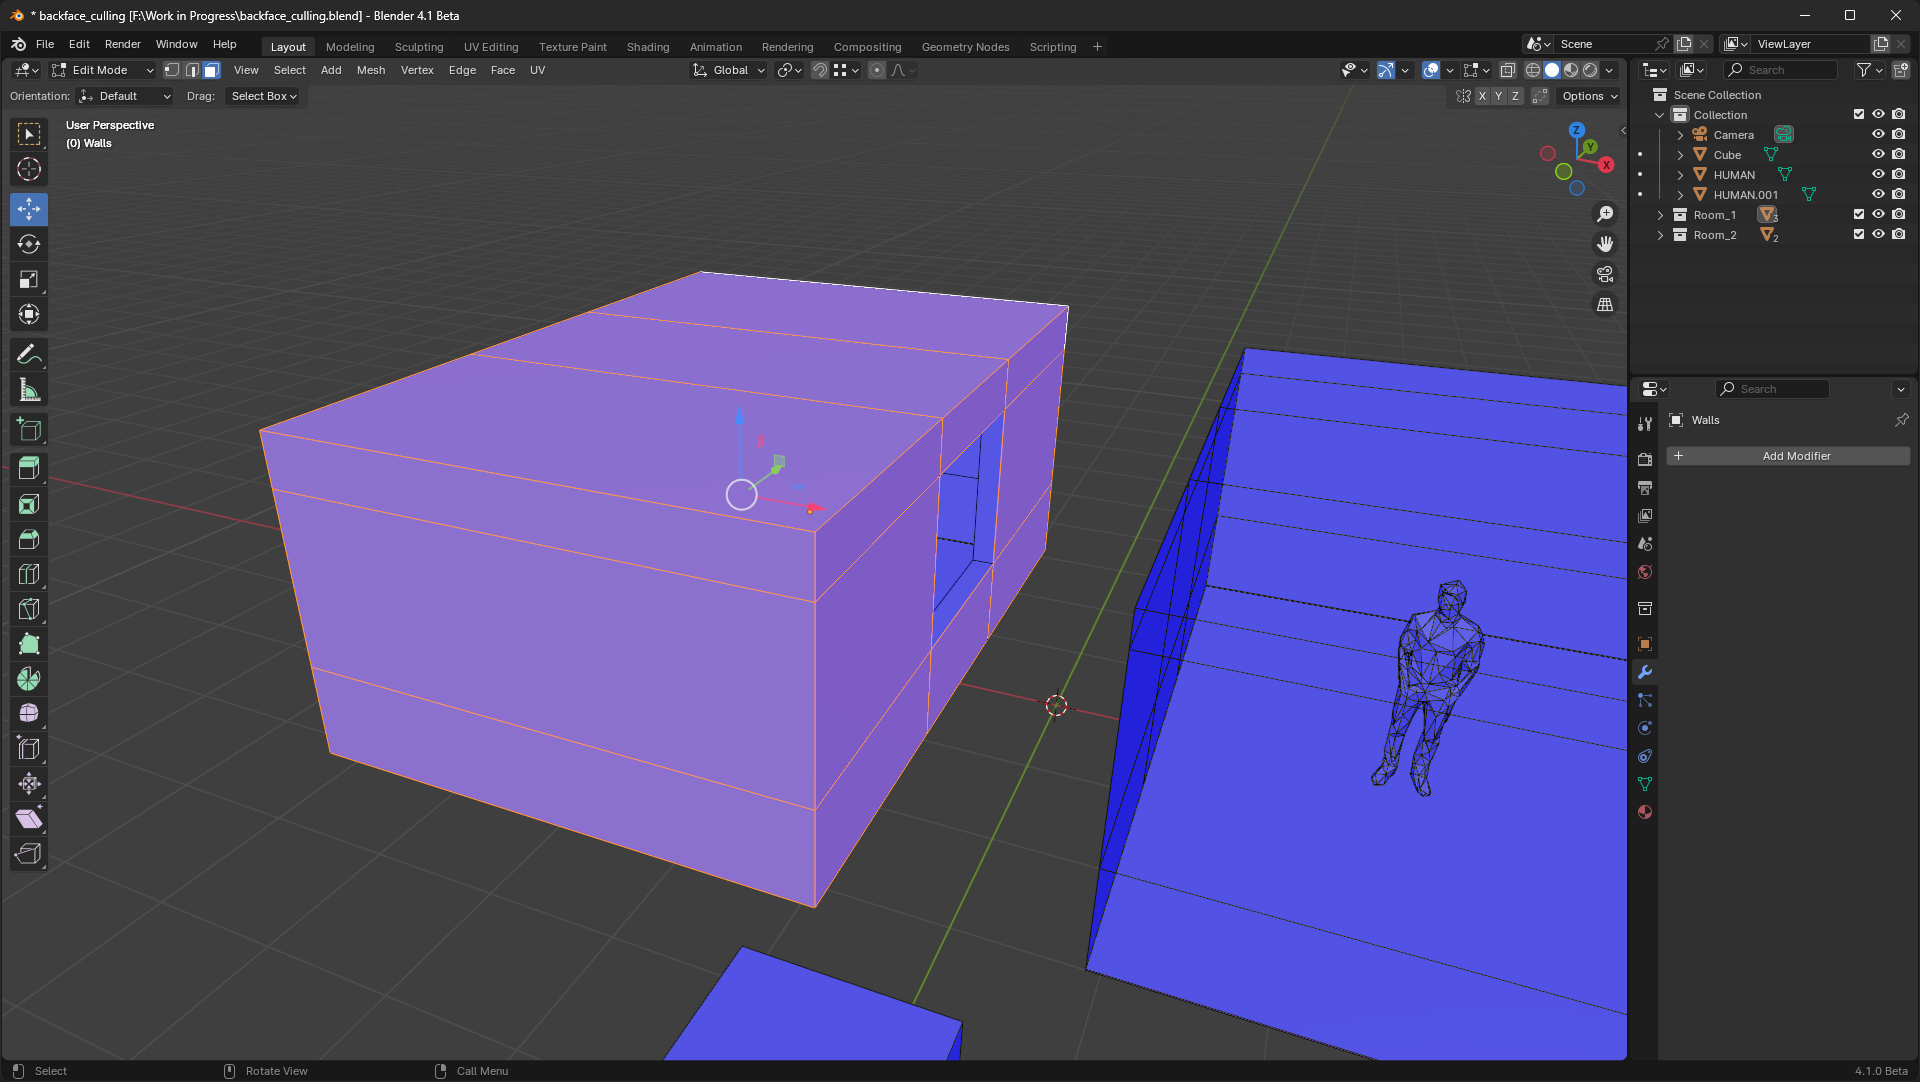
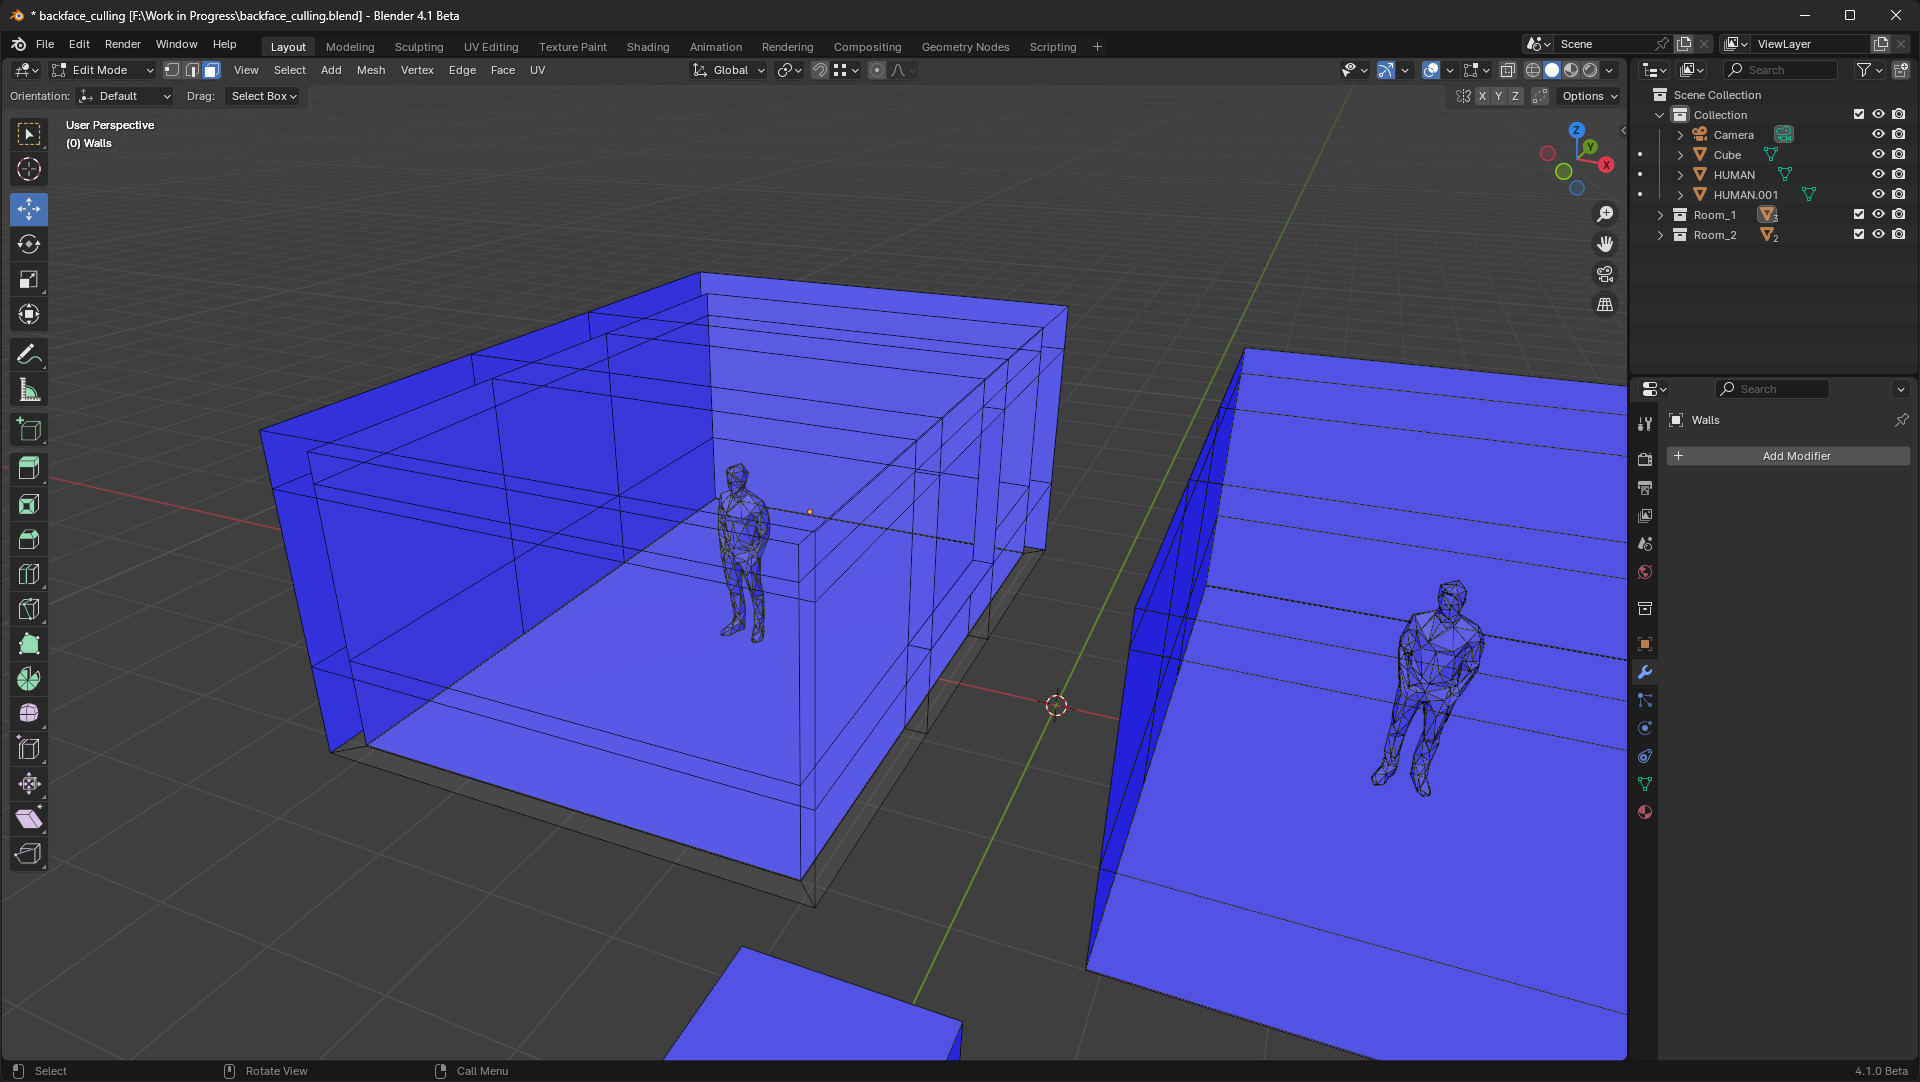
All areas (normals) that are blue and are displayed towards the viewer are correct. All red areas that point towards the viewer are basically incorrect. This means that if you render your house from the outside, for example, and these areas (normals) are blue, this is correct. However, if the surfaces are red, as with the small cube, the normals are incorrectly aligned.
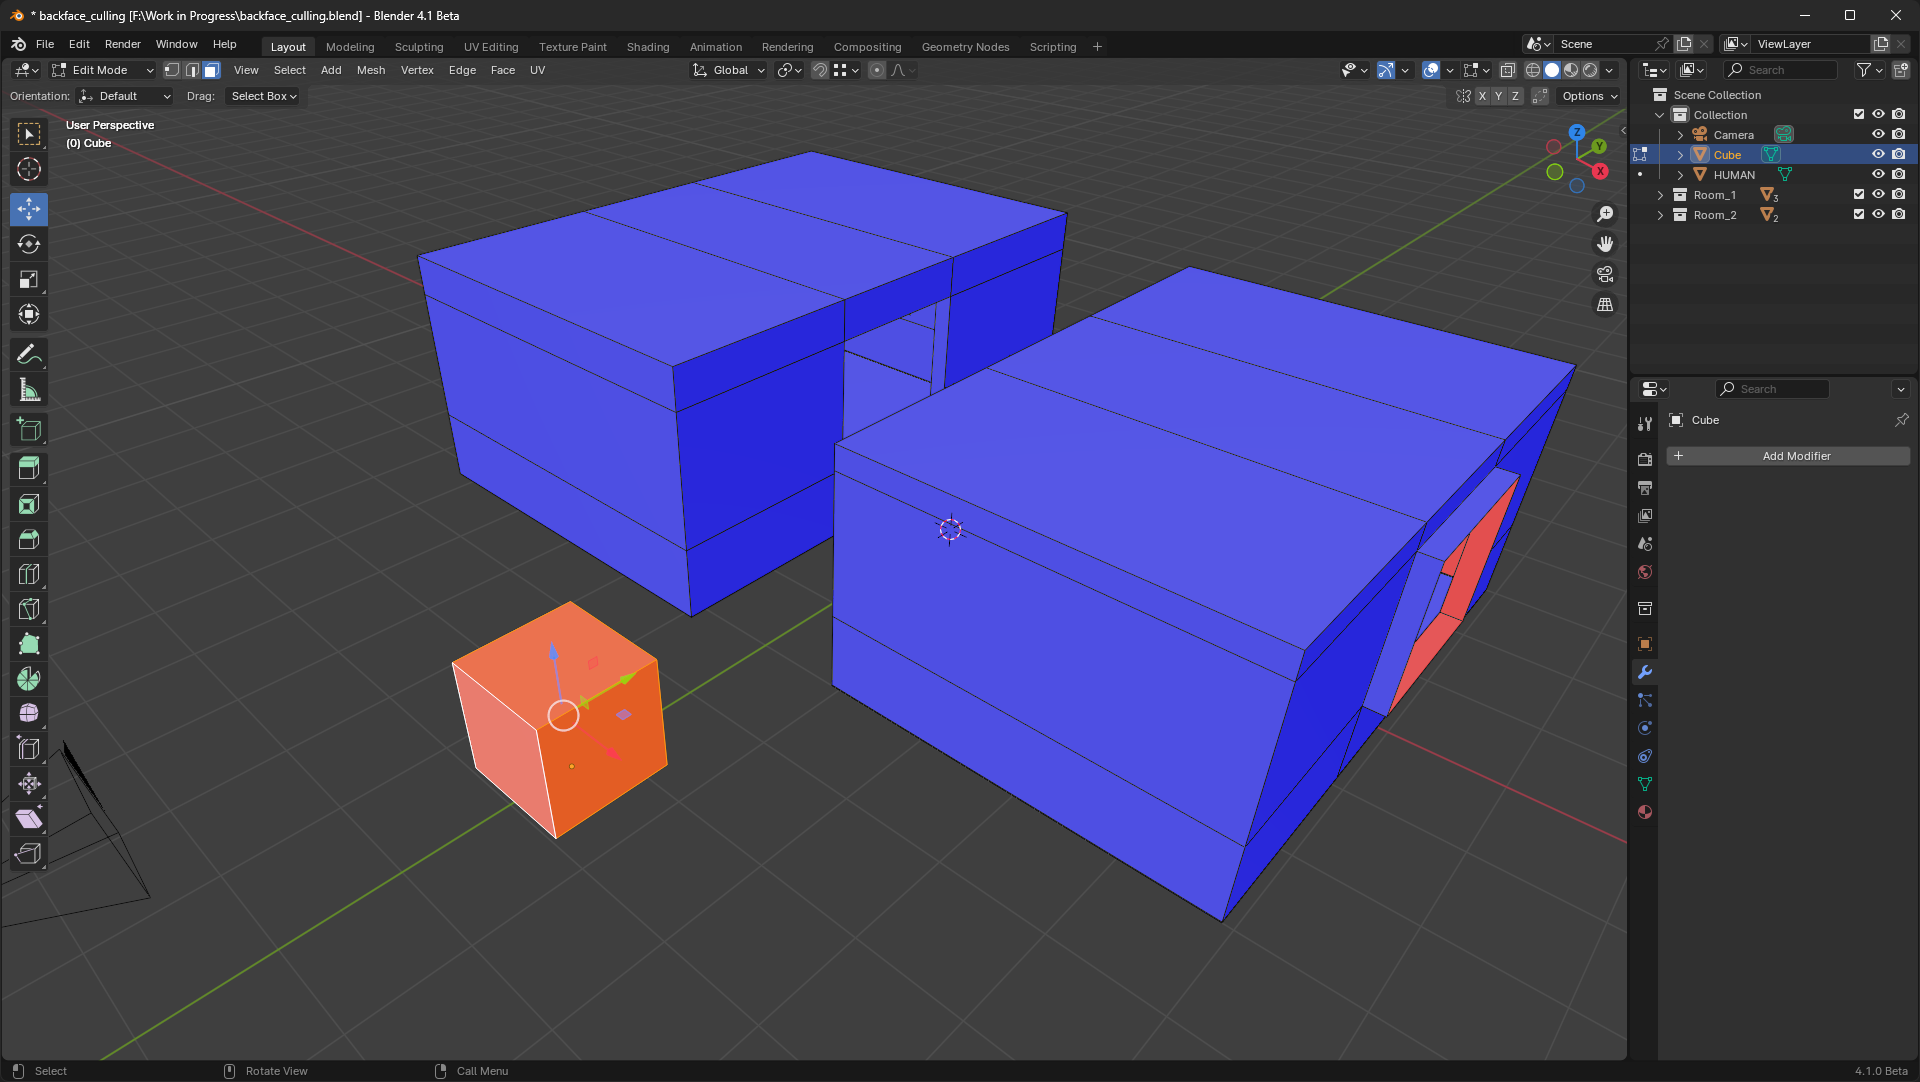
To align these red areas correctly, select the object in question and go to edit mode with the Tab key and then press the „3“ key to go to Face- Mode. Now select all areas that are red, if all areas are red, you do not have to select them individually, but press the „A“ key to select everything.
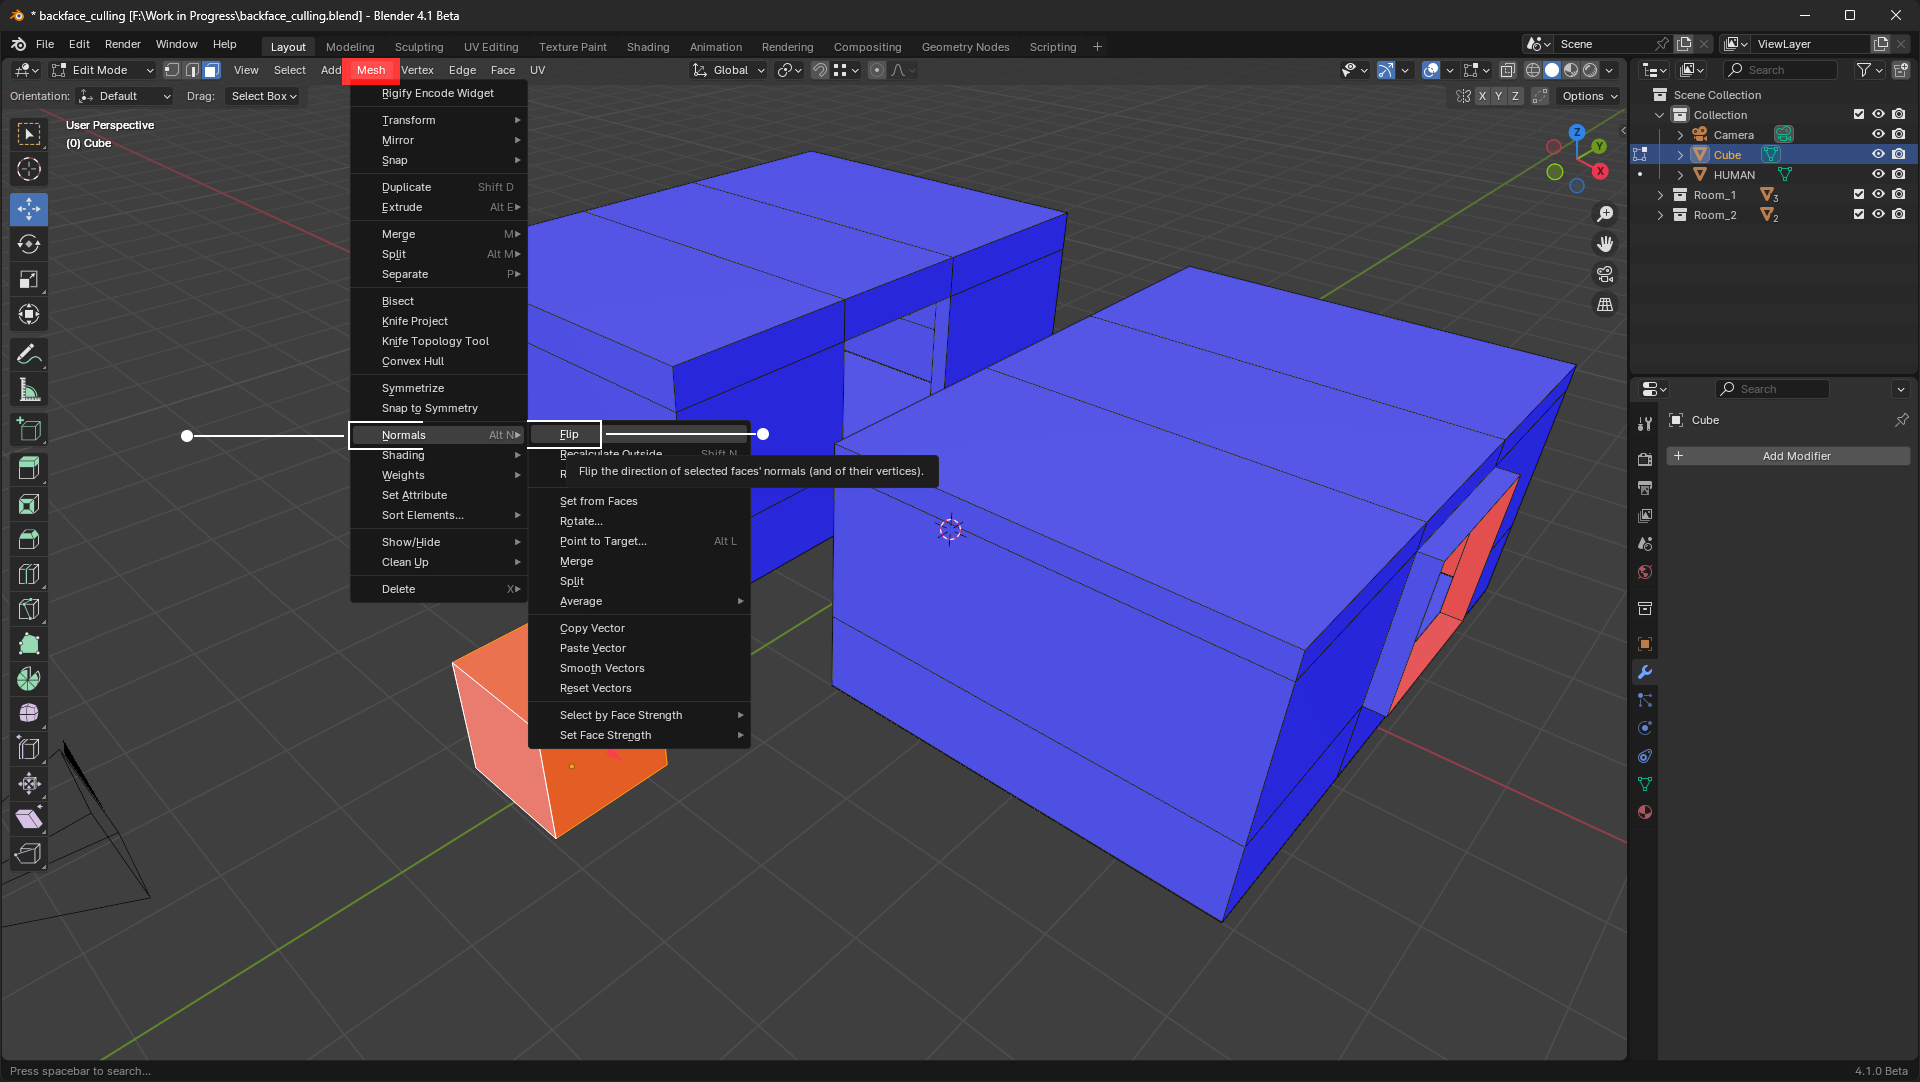
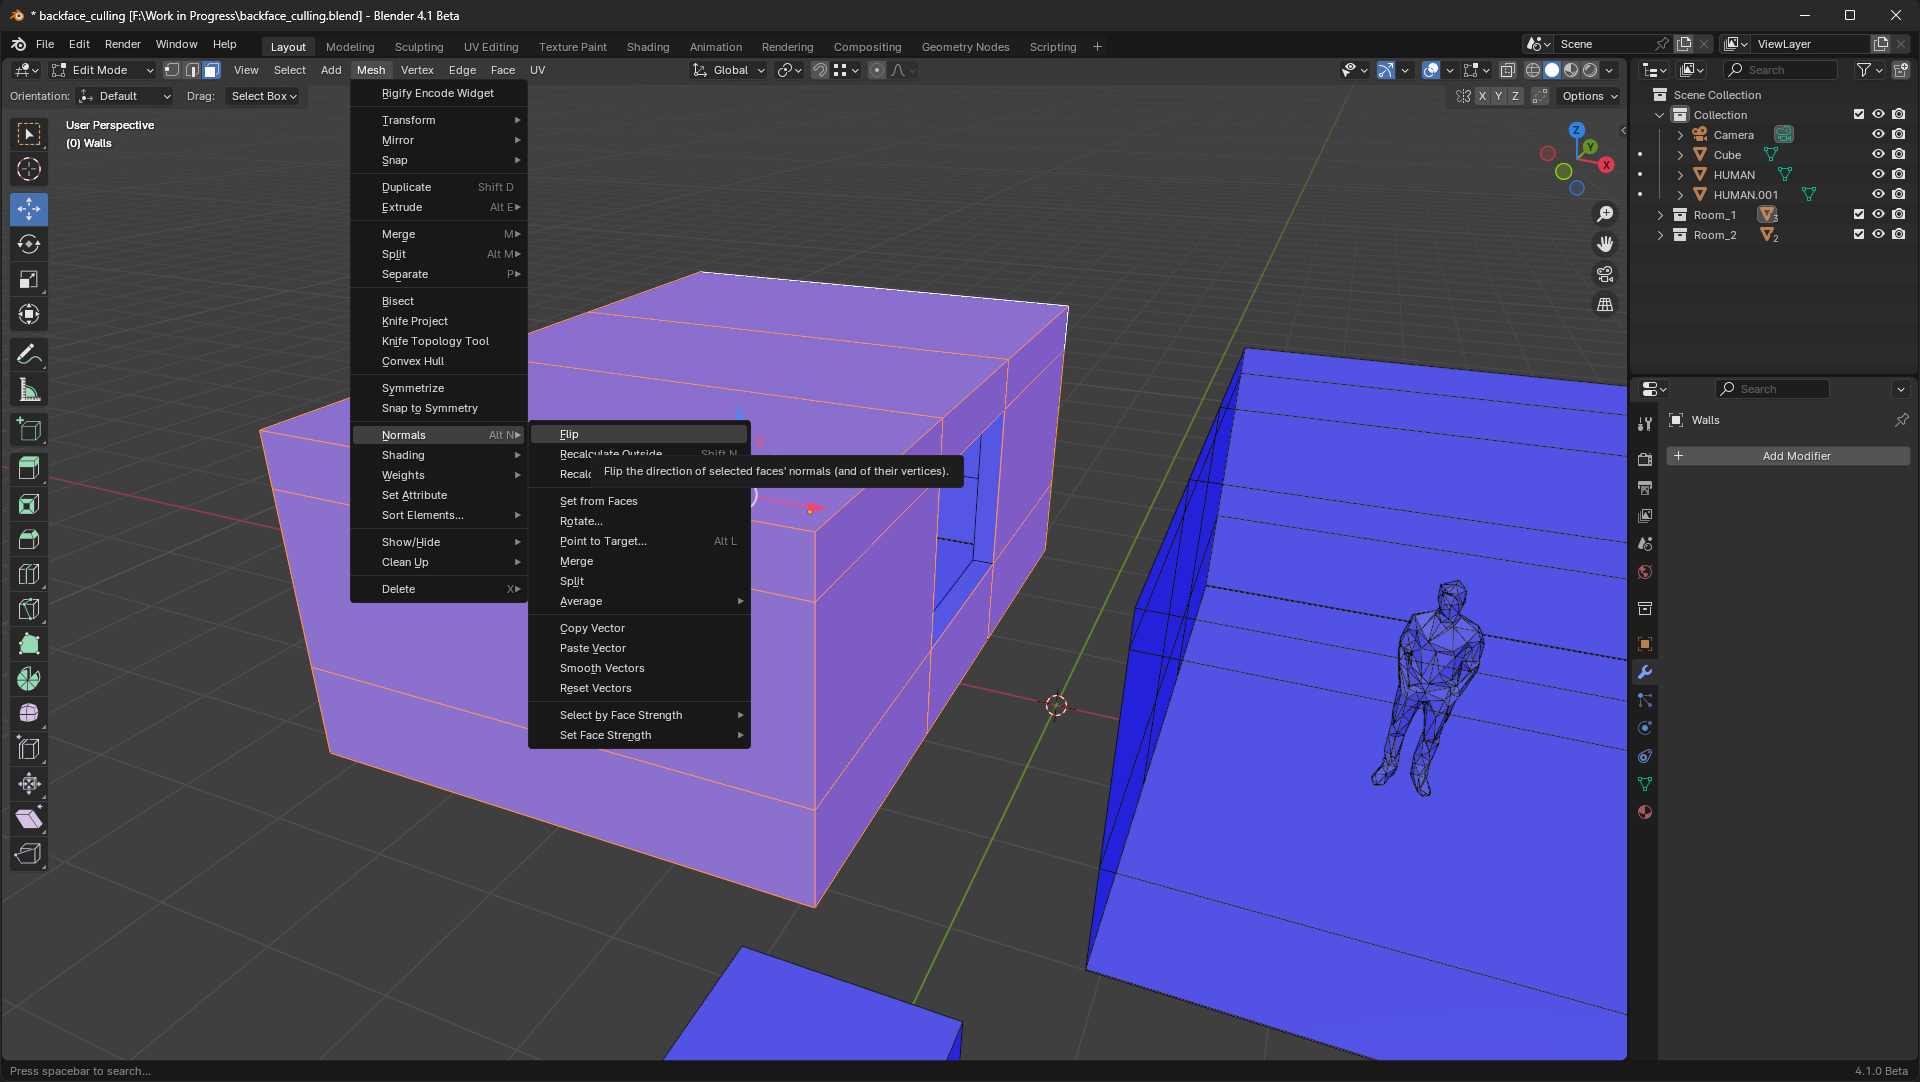
Then go to „Mesh – Normals – Flip“ at the top of the menu or press „Alt + N“ on your keyboard. When you exit „Edit mode“, your surfaces or „Normals“ should be correctly aligned.
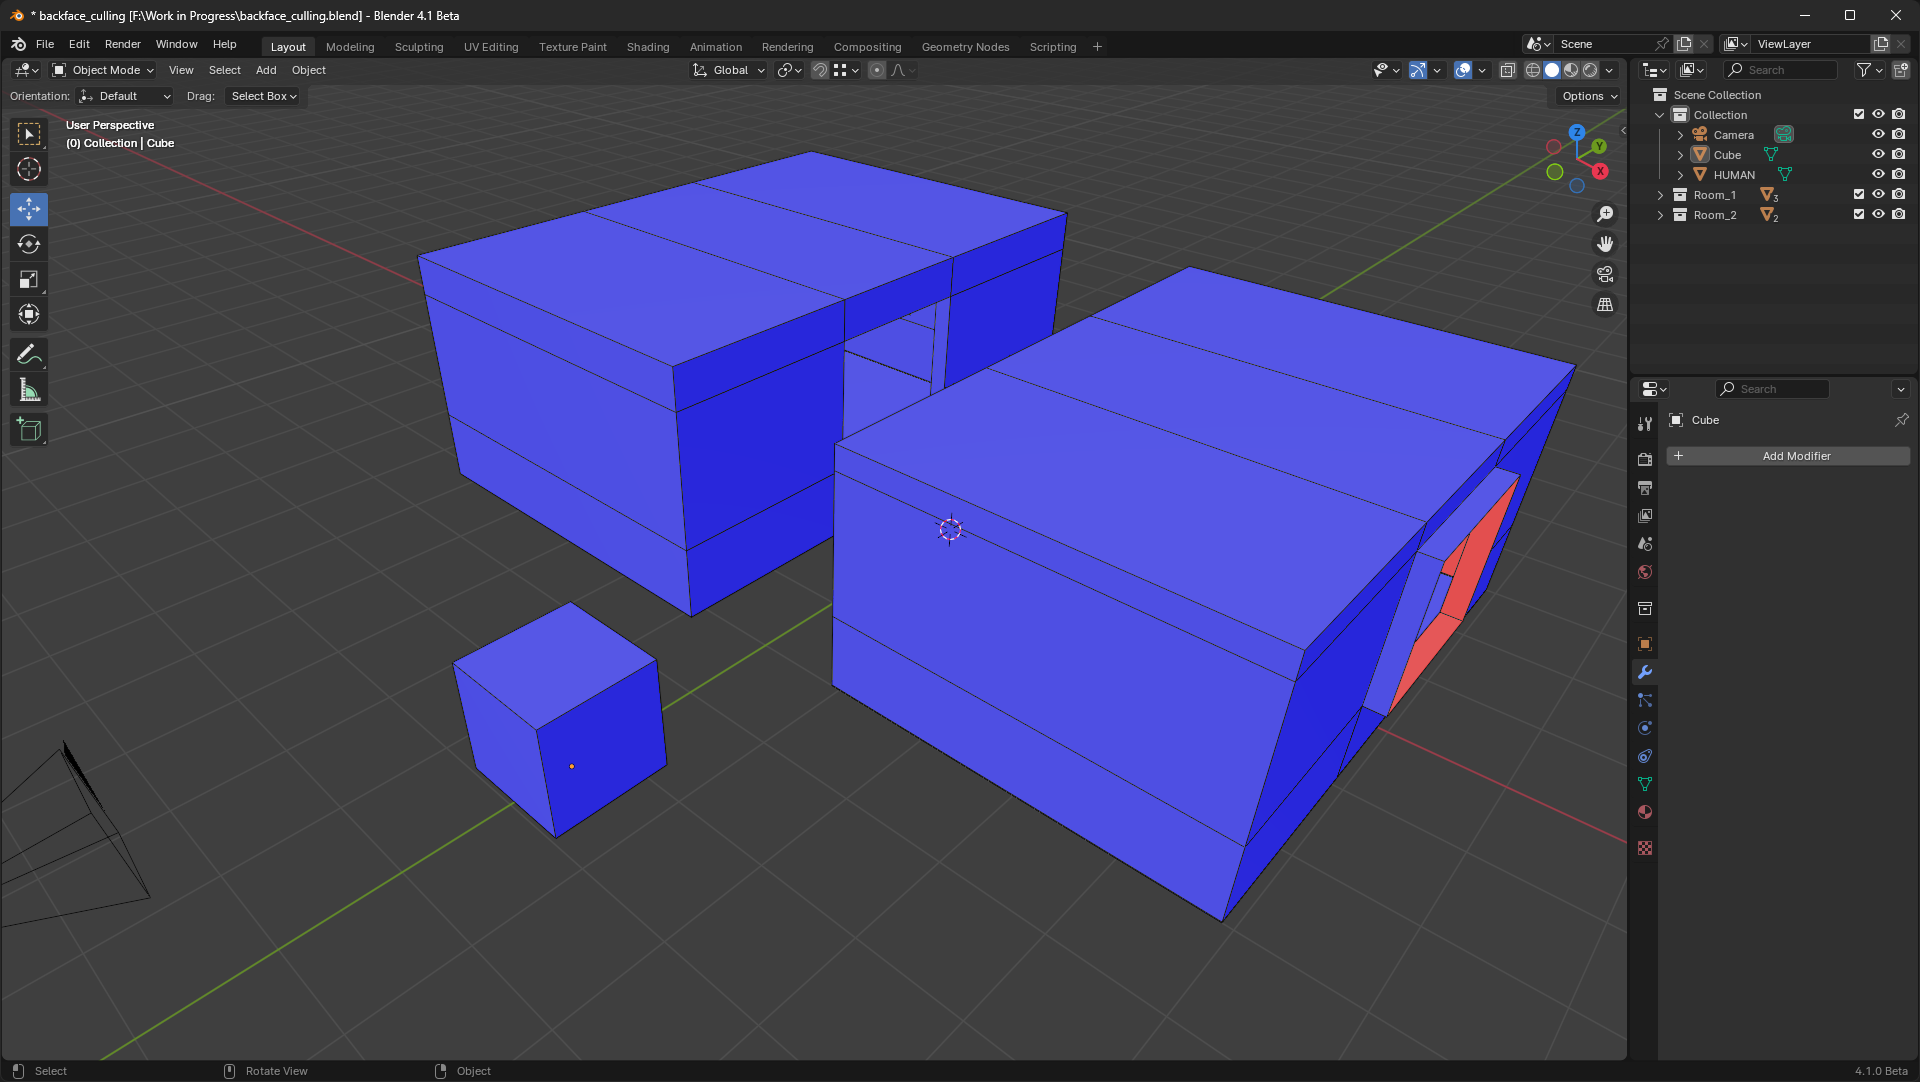
To illustrate this again briefly, if you want to render and show an „interior scene“, for example, and your surfaces (normals) in the room are red as in this example, then you must invert the „normals“ so that they are correctly aligned.
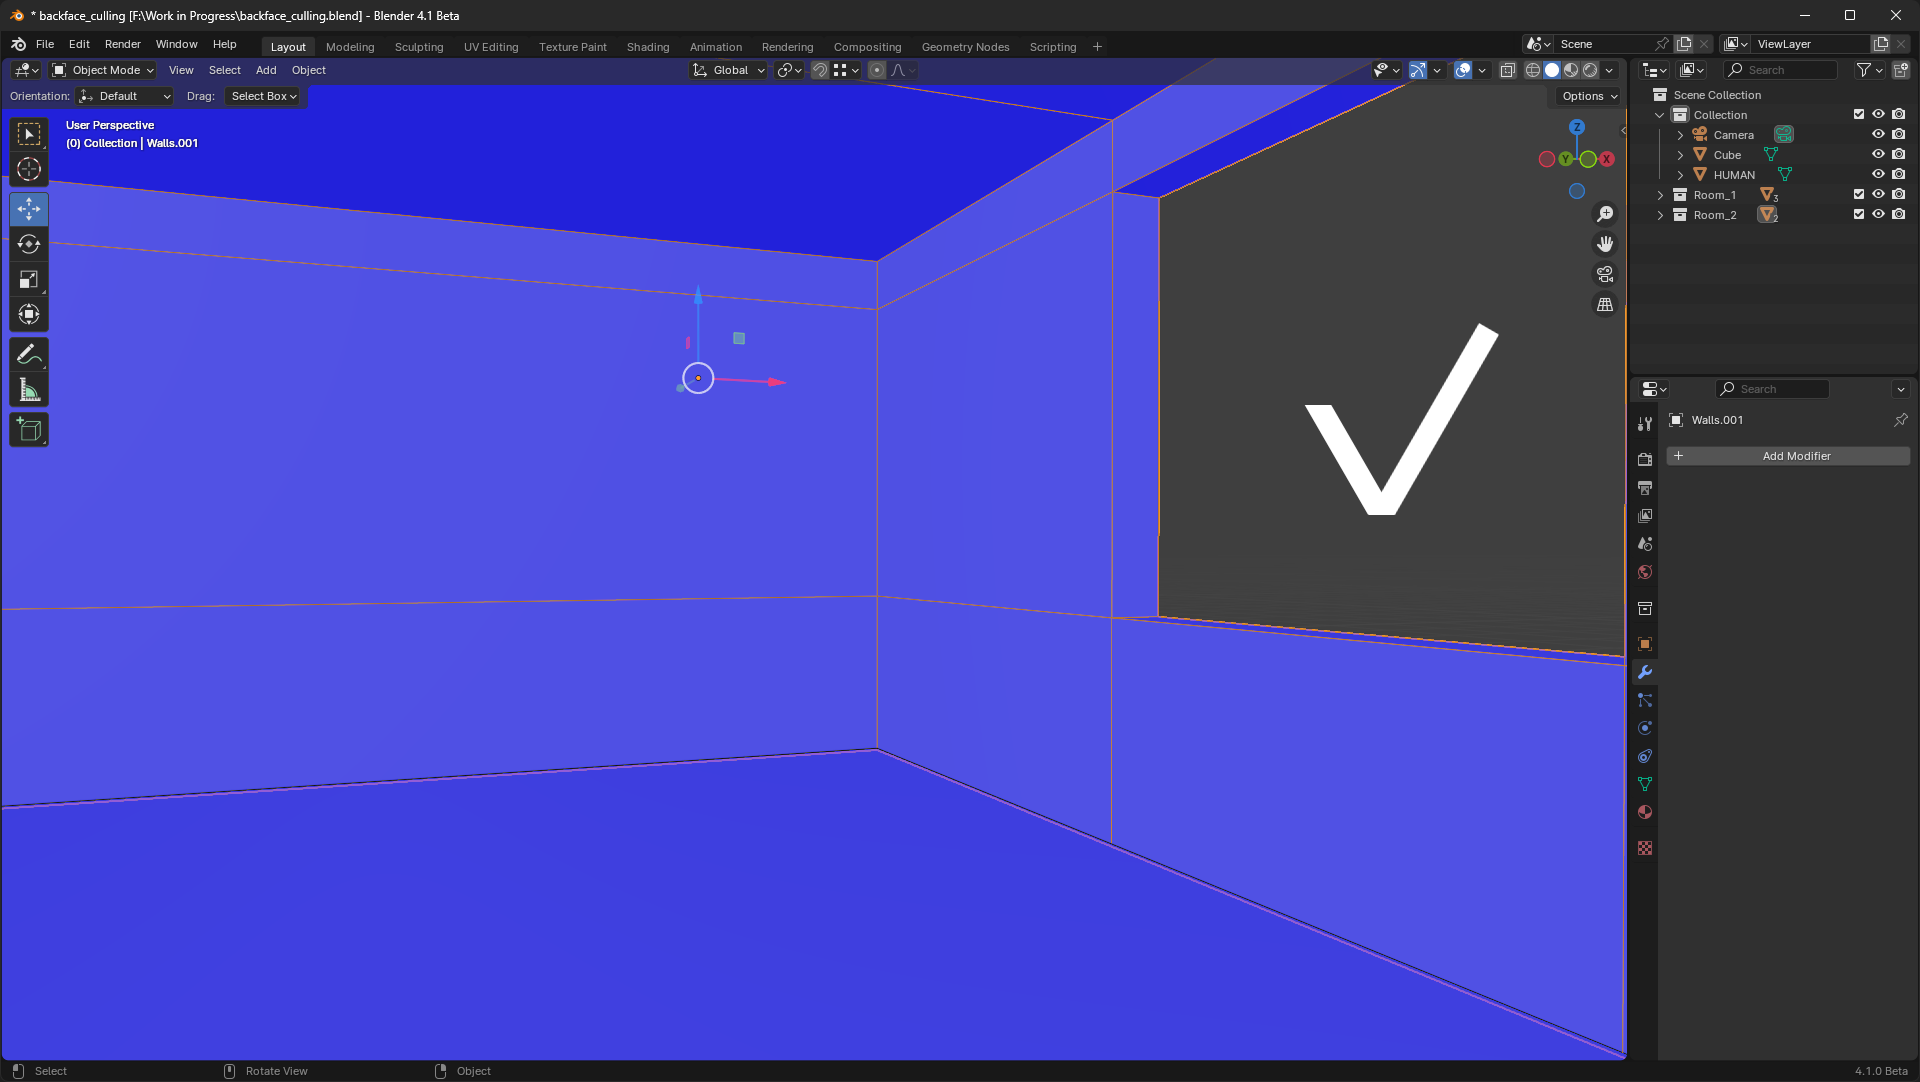
For „backface culling“ to work, however, the „normals“ must be placed the other way around. This means that in order to see what is in the room, the outer surfaces must be red. As in this example, in the room where the walls only consist of surfaces, everything is correct. Inside the room, the surfaces are blue and outside they are red, which is how it should be.
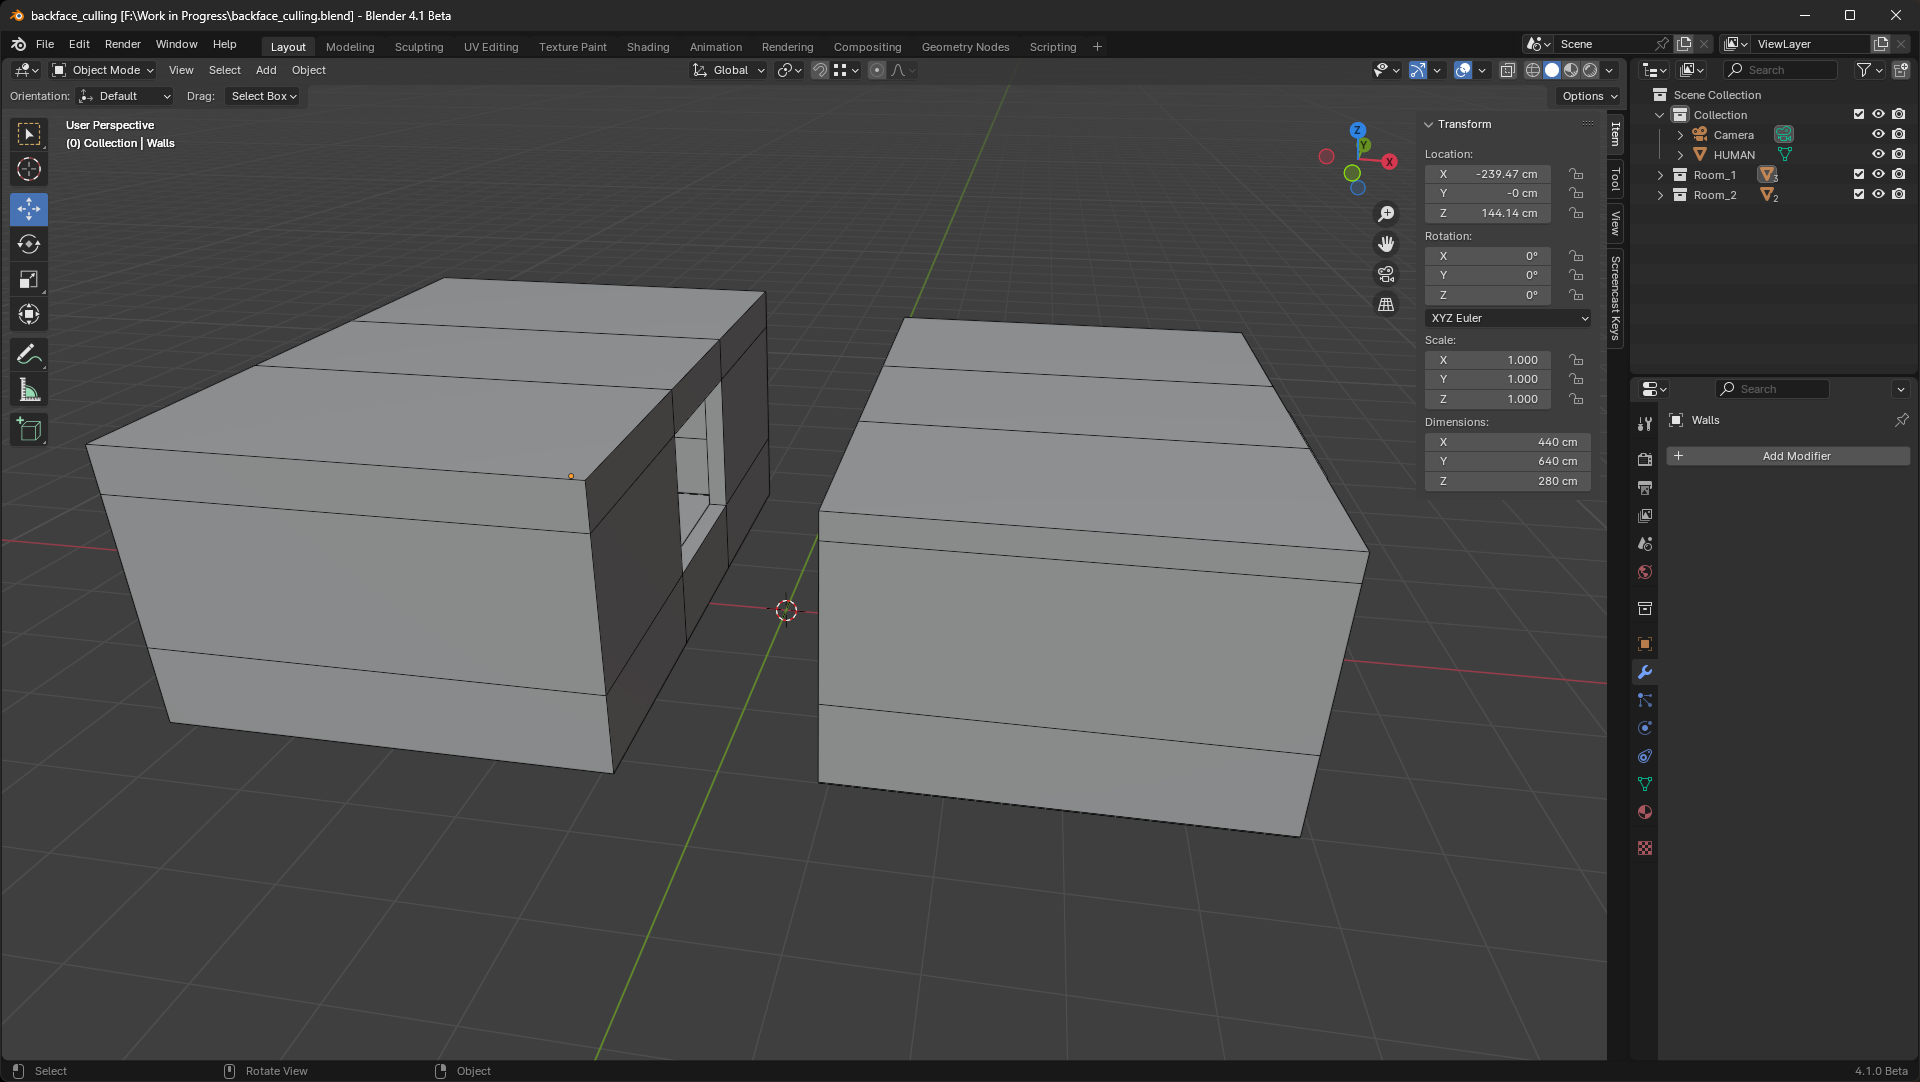
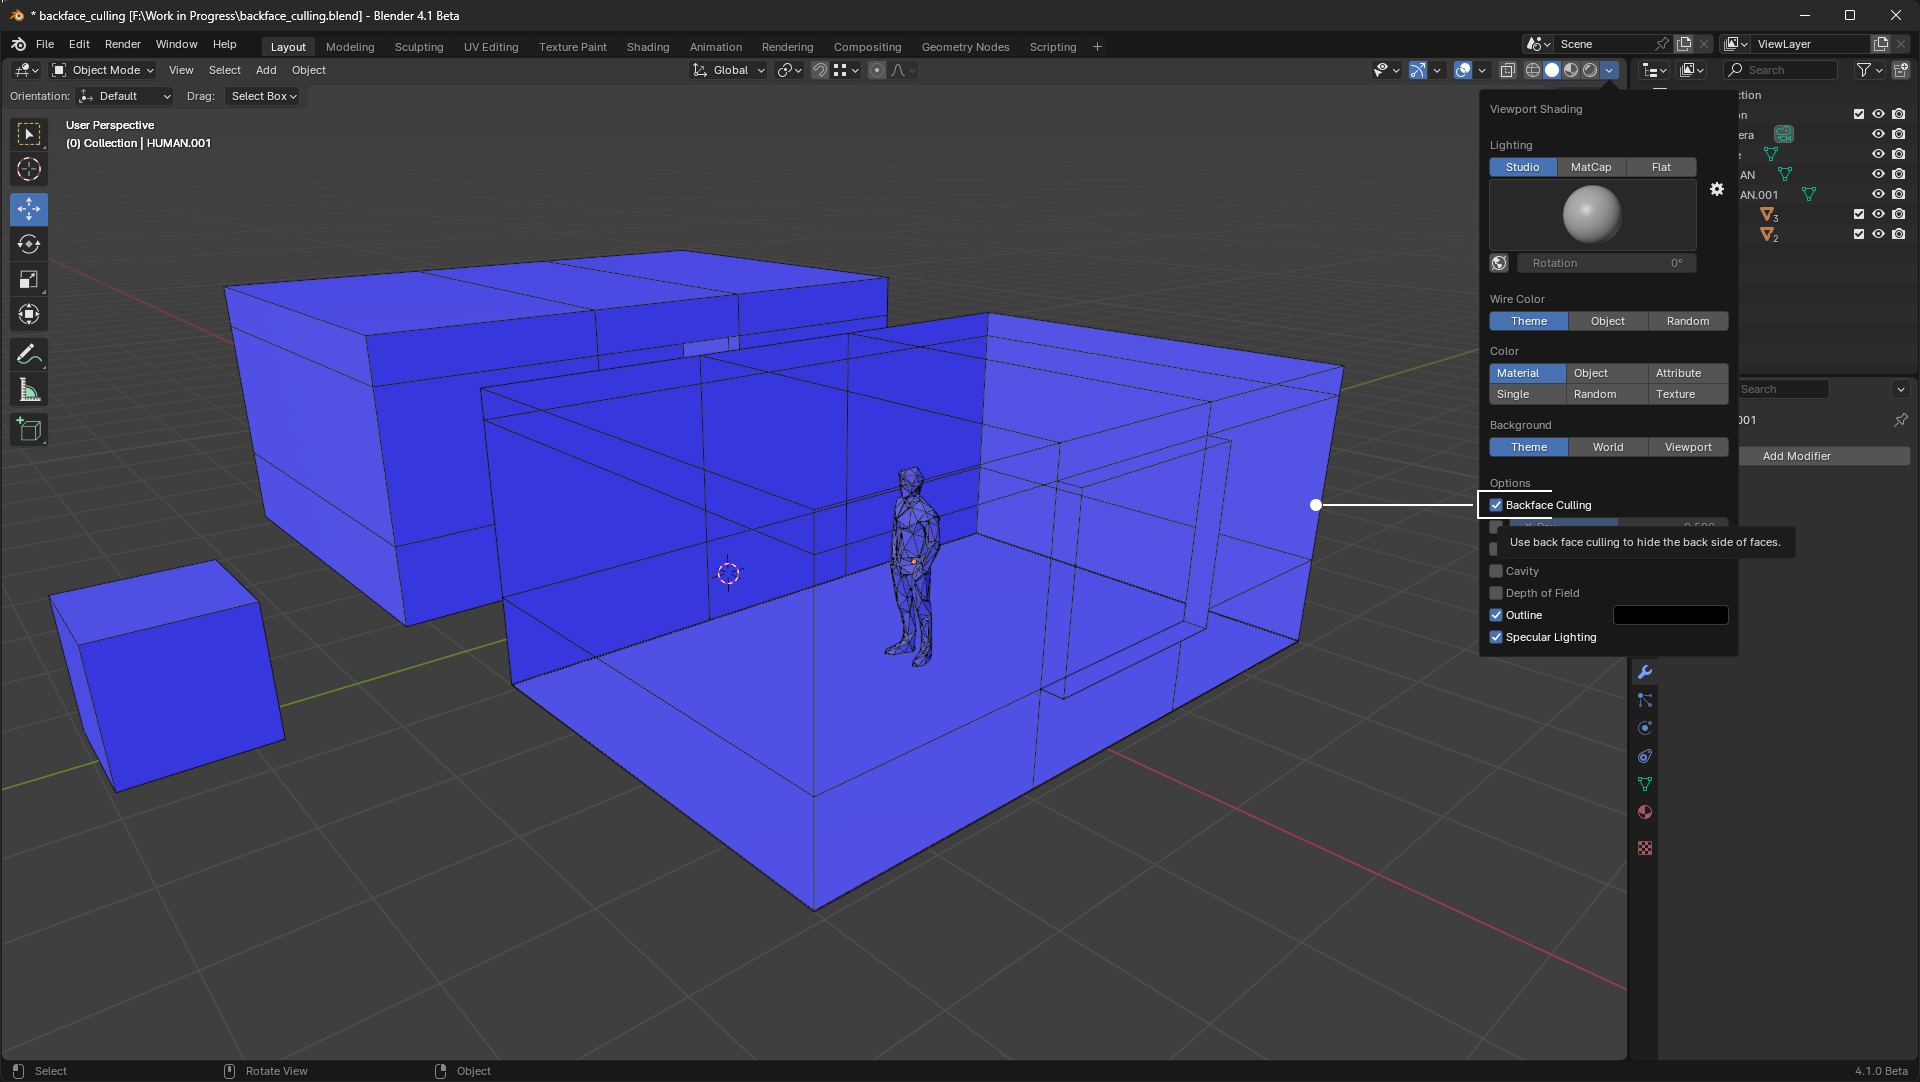
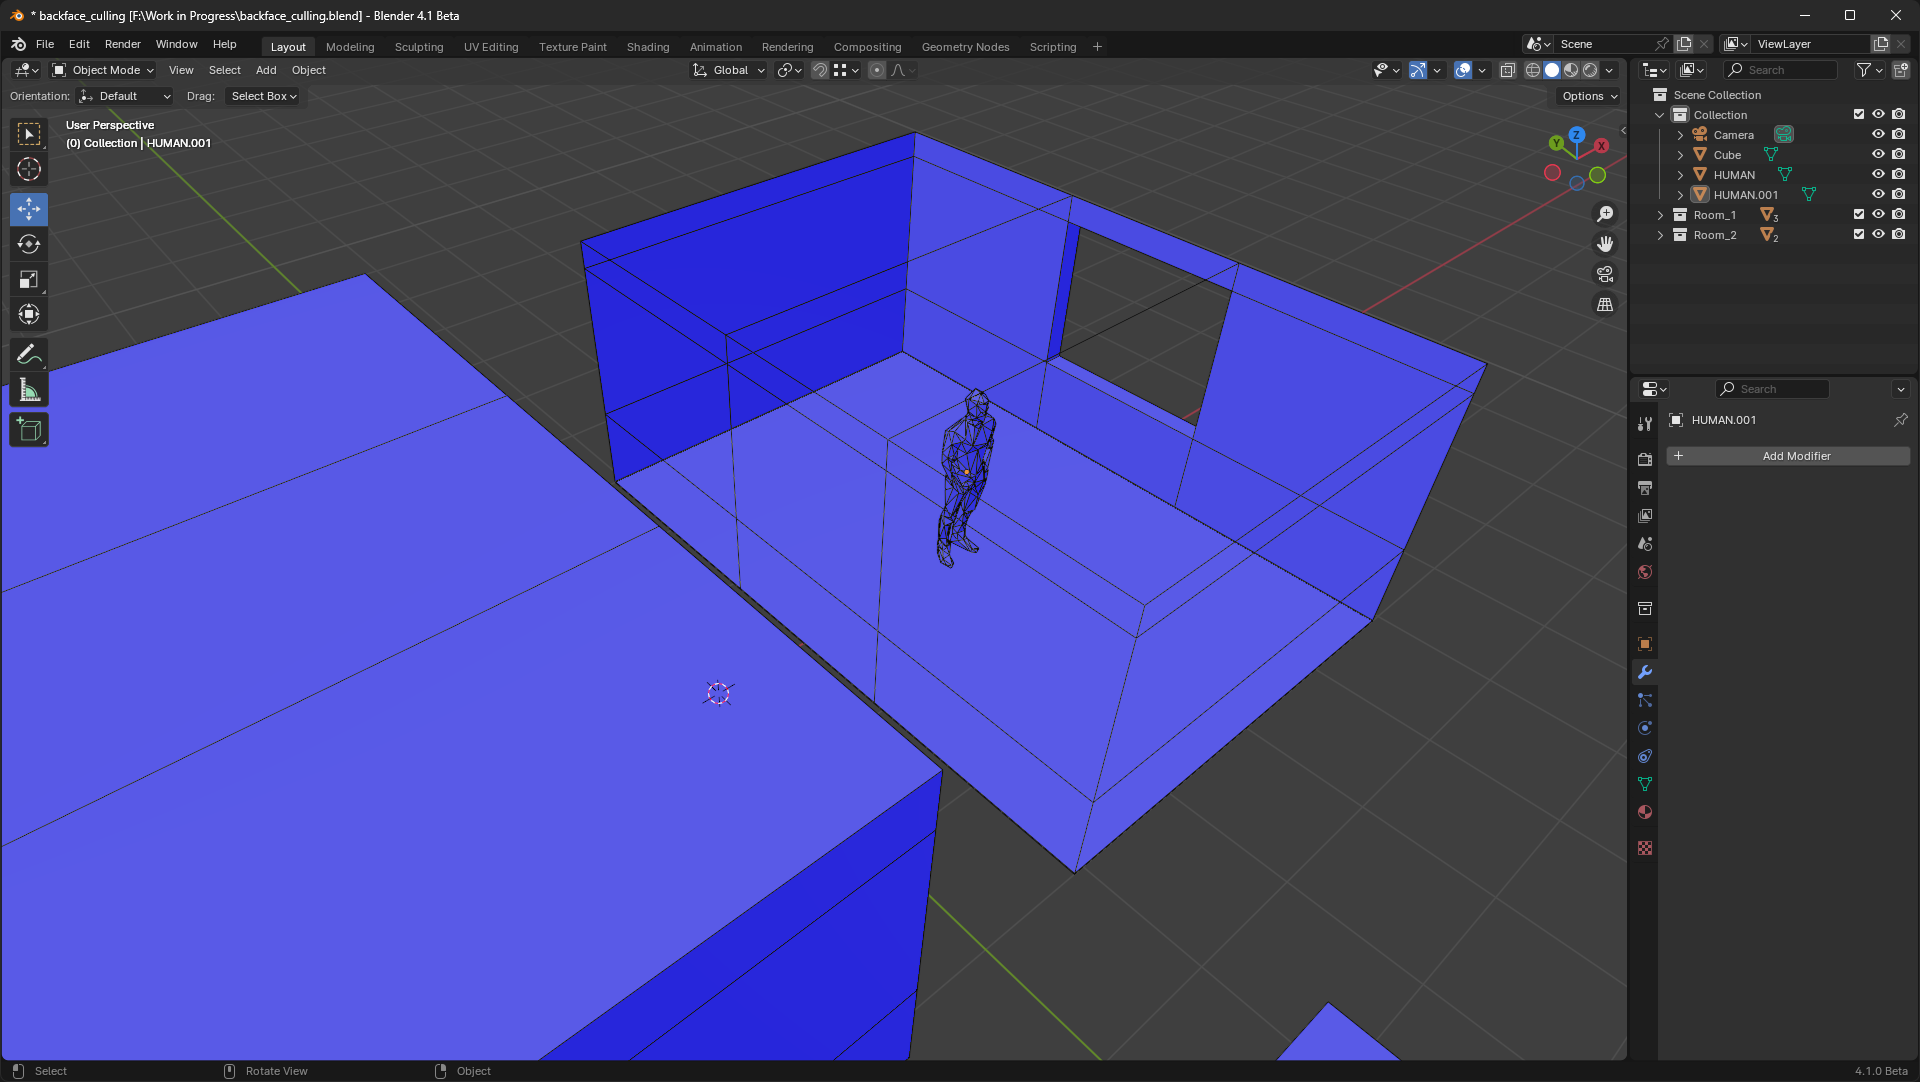
If you now click on the small arrow at the top right of the „Shading tab“, select „Backface Culling“ and Boom. Now you can see the room from the inside, no matter where you pan with your camera, you can always see the interior with this function.
However, you will have noticed that you cannot see into the left-hand room, this is because we have a wall thickness here. Here we have to click on the walls and switch to „Edit mode“. Use the „3“ key to select „Face-Mode“ again and then select all the outer surfaces.
Then go back to „Menu – Mesh – Normals – Flip“ at the top and voila, you can now also see the interior.
That’s it, this method saves you time and effort and is very effective. Once you have completed your scene, make sure that your „normals“ are correctly aligned again later when texturing and rendering. To check this, click on „Face Orientation“ again as explained above.