
ArchViz Realism Study
„Realism“ is a large and wide-ranging topic in the 3D sector, and there are many different approaches and opinions. There are many misconceptions, false facts or simply exaggerations. For example, there are some tutorials online and from artists who believe that if they apply an imperfection to wood, glass and the like and exaggerate it in the settings, they basically want to show that they have mastered this skill. But in fact, the sum of all the smaller „imperfections“ that are barely visible at first glance actually make up the overall picture.
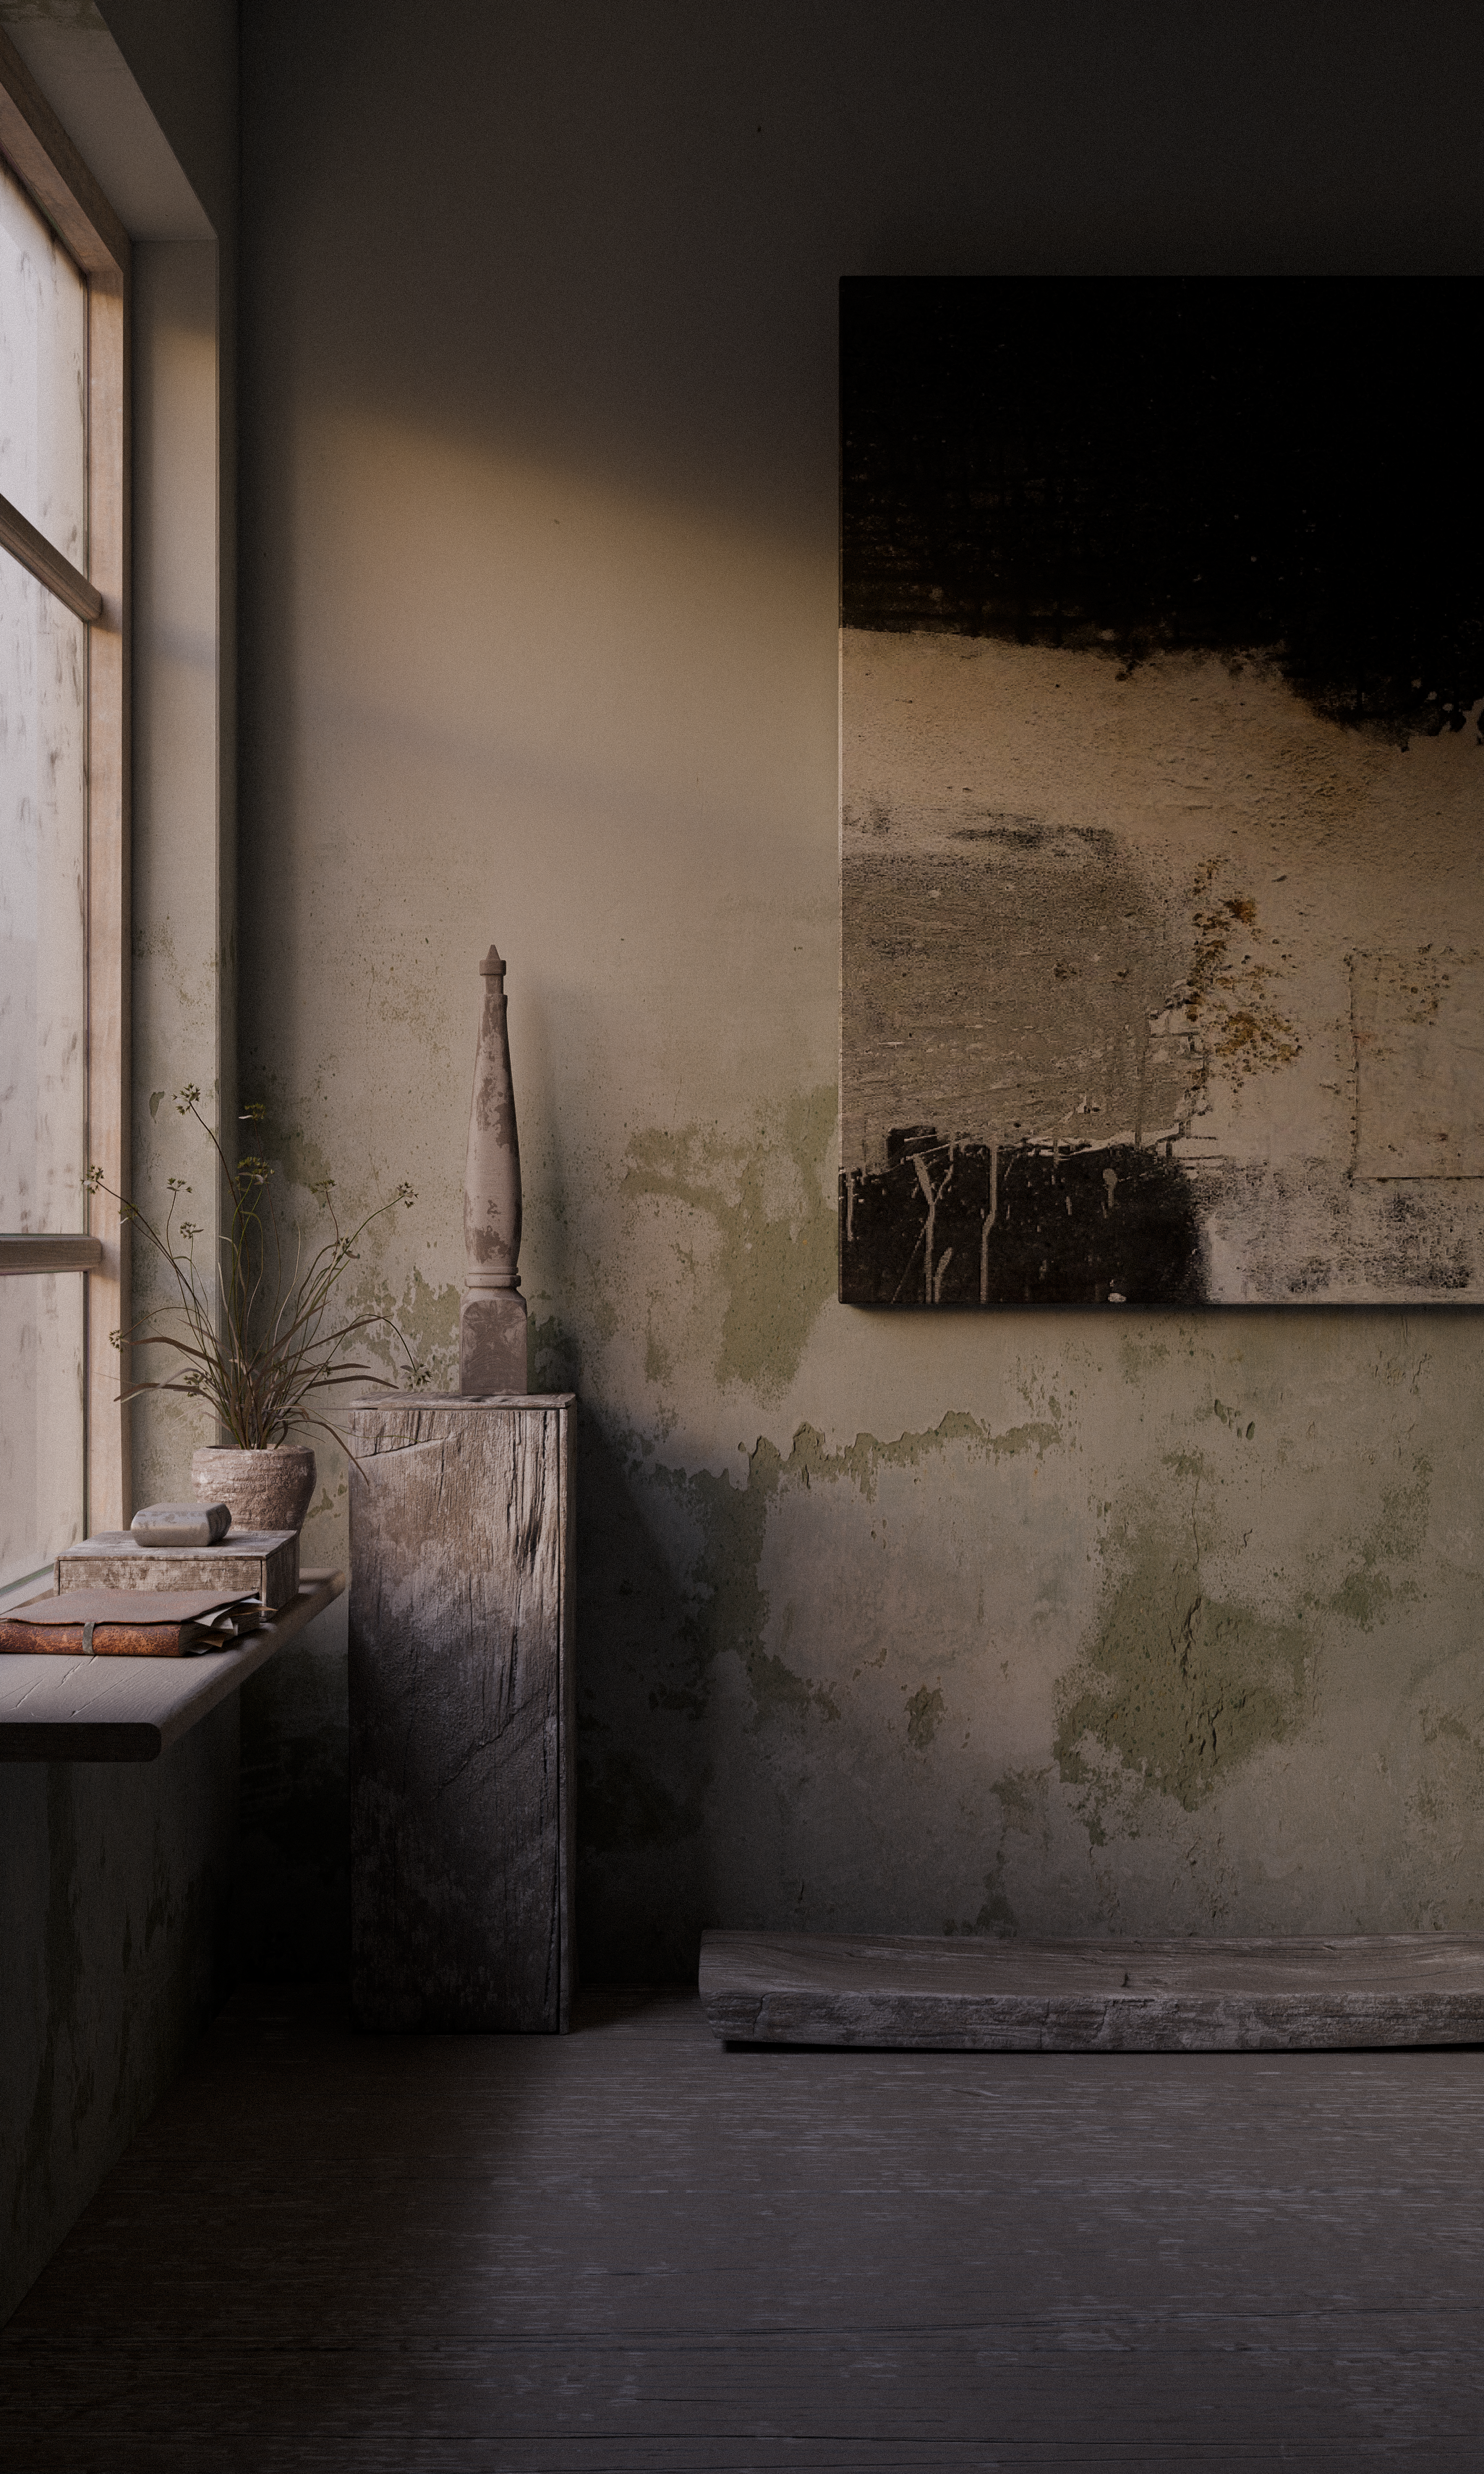
Another very important point is the lighting: many people think that a lot helps a lot, or rather, they follow a trend that runs like a red thread through almost all the visualizations shown. From a craftsmanship point of view, there is often hardly anything to criticize, the objects in most cases cleanly modelled, whether bought in or modelled themselves. The materials are also mostly of high quality. But at the end of the day, it is the light that ultimately destroys the well-intentioned work. Take your time and look at various ArchViz renderings, most of them look almost identical. There are exceptions, of course, but you will usually agree with me. For comparison, take a look around the room you’re in… I mean… Which room in real life is so perfectly lit or which room is so bright and immaculately lit? Ok… An operating theater maybe, or at events and trade show booths maybe. But actually there is only ambient light in the room and in some places various artificial lights such as lamps. That’s about it.
I’m well aware that it makes a difference whether you’re visualizing for a client or just doing it for the fun of it. But here too, I would simply like to say that this „clean“ and „clinical“ bright look is sometimes a hindrance and doesn’t really fit in with the overall impression. But that’s just my unqualified opinion. I don’t want to claim to be a master of the trade, I just want to give you a little food for thought. I’m still a long way from being a master, but I’ve certainly learned a lot in this respect and that’s why I’d like to share my modest knowledge with you here and give a few tips on this topic as best I can, especially for newcomers and career changers.
The Edges:
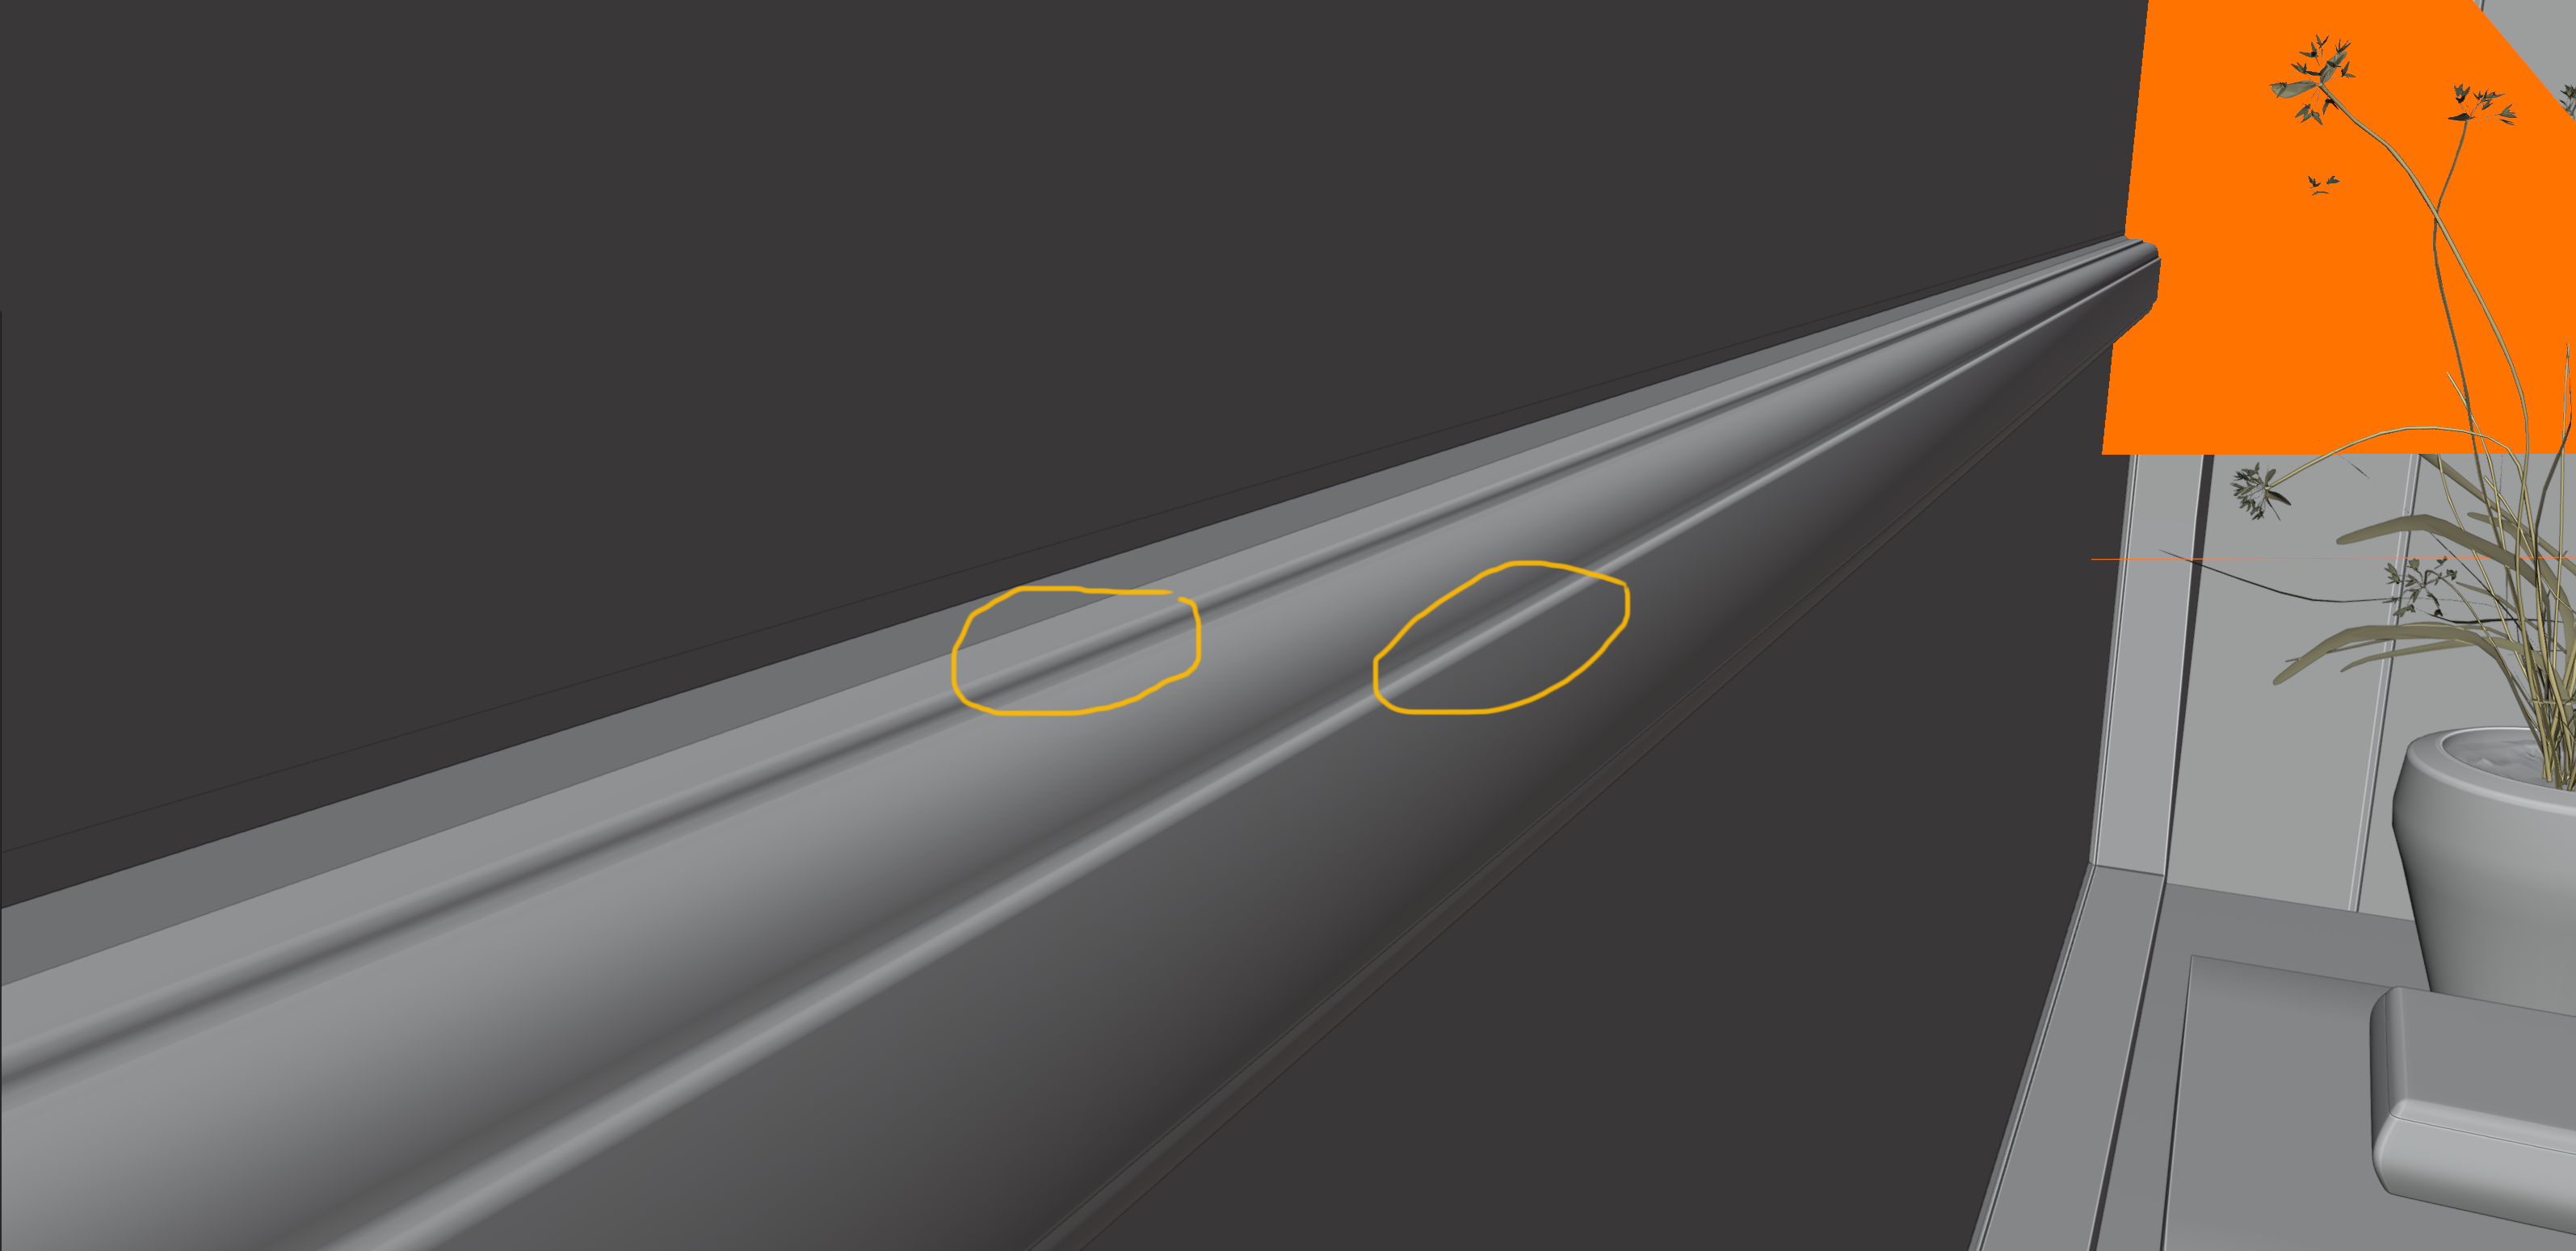
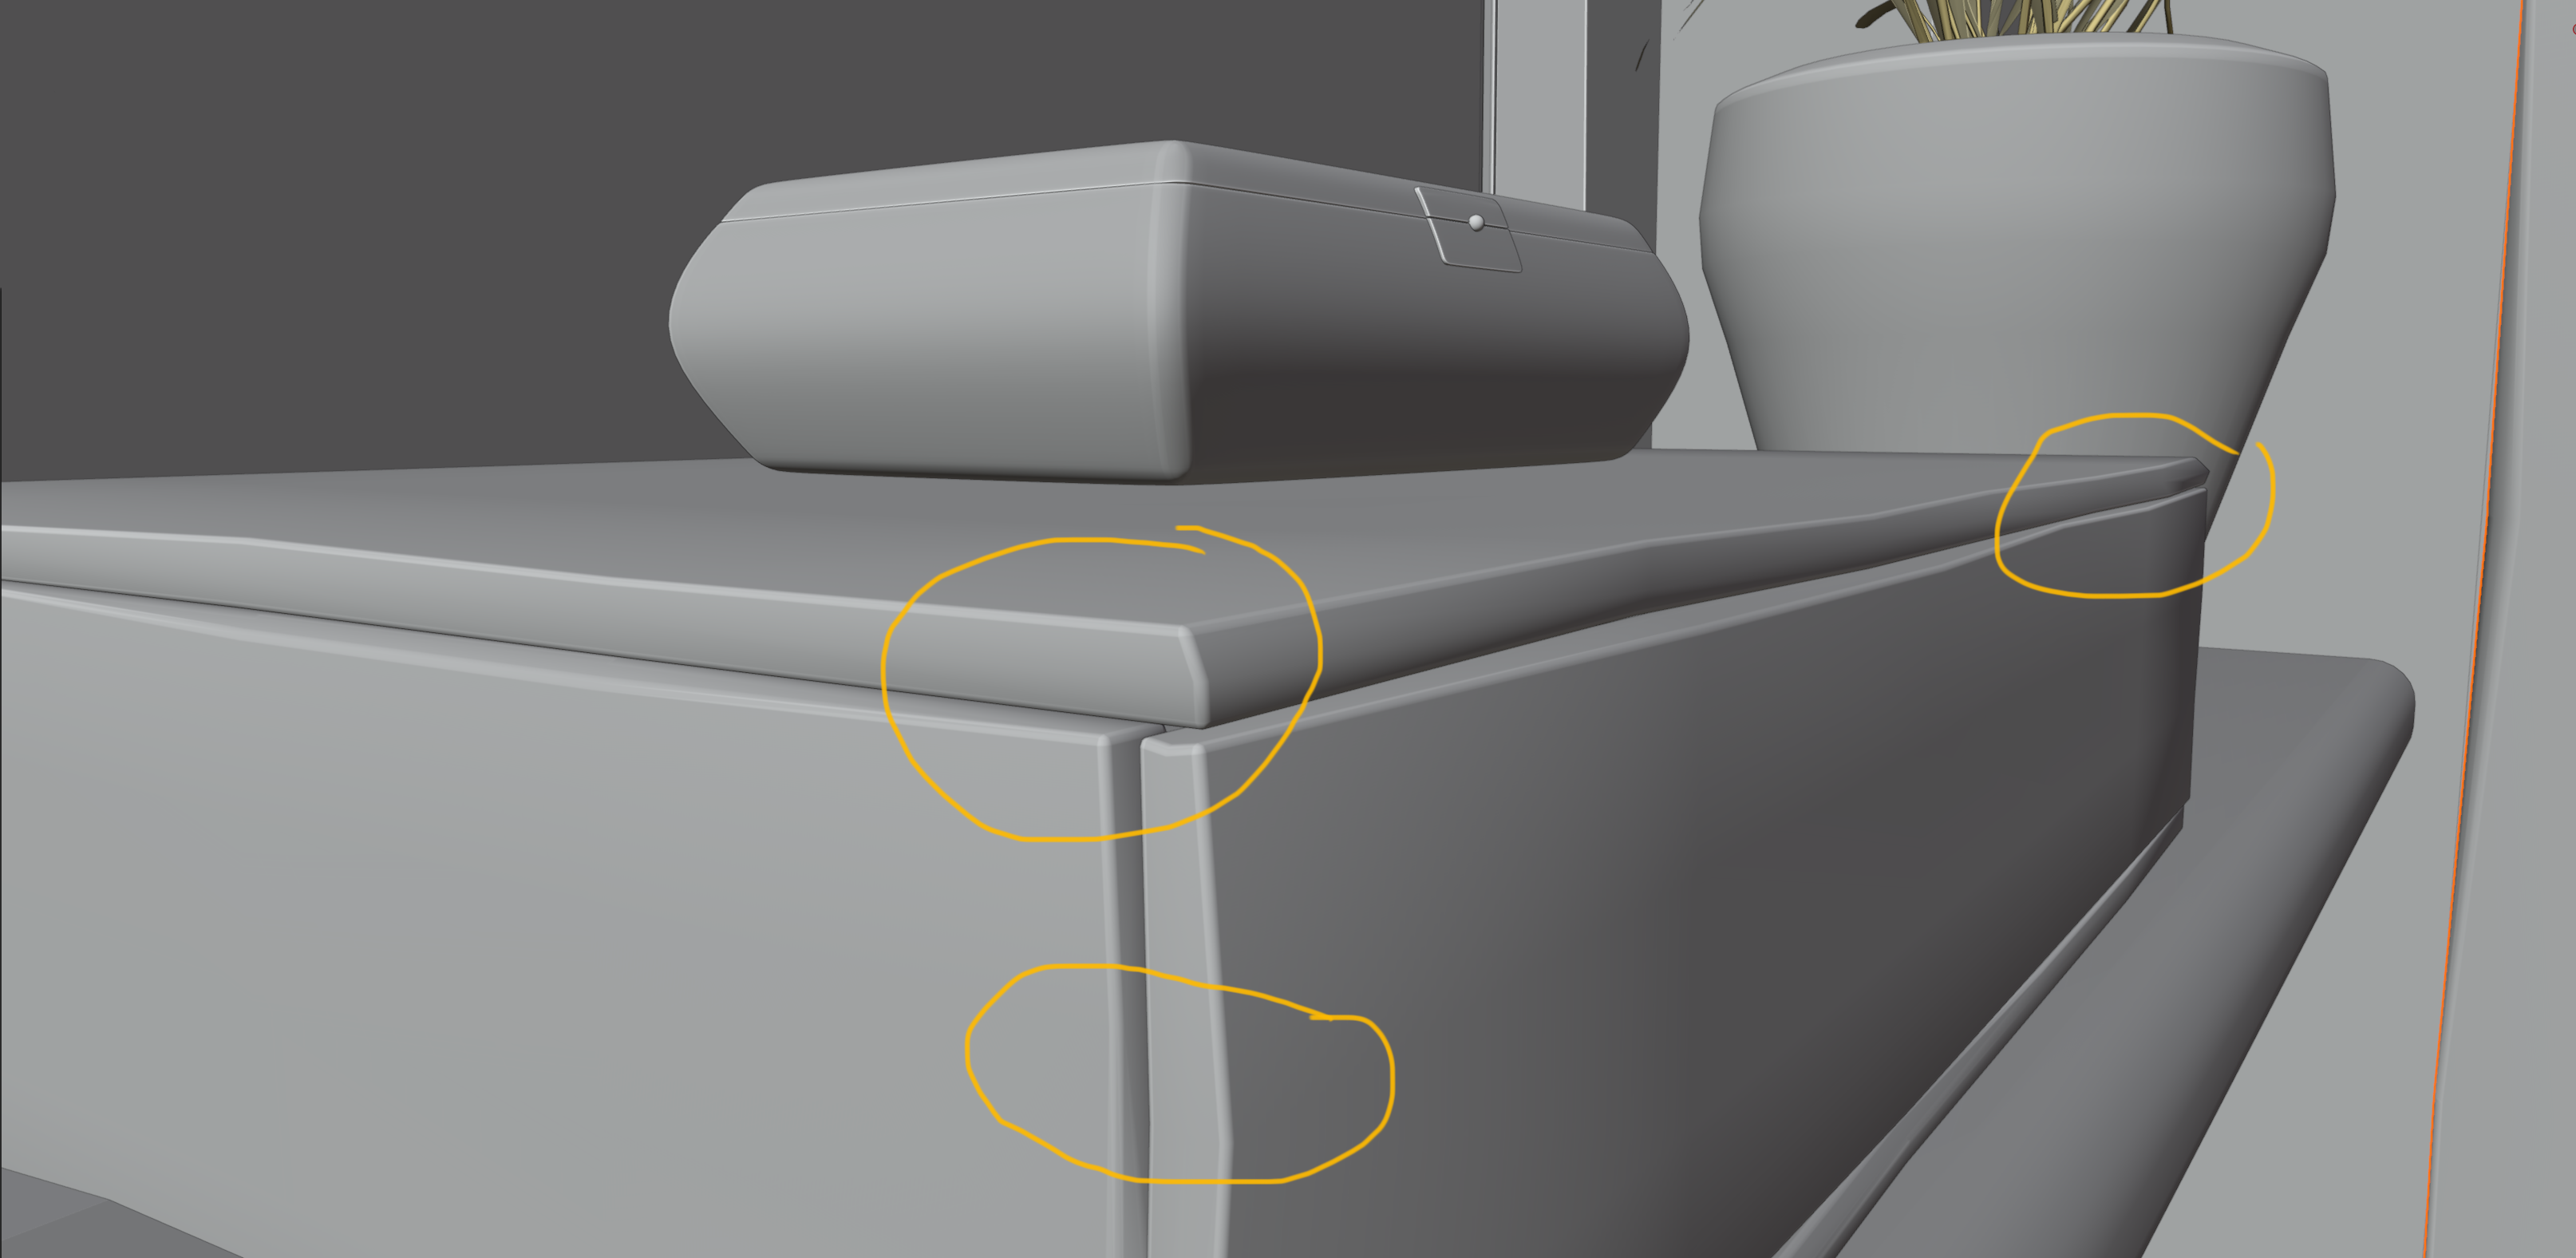
Some may think, oh, here we go again. But you wouldn’t believe how many renderings I’ve seen, even from professionals, that don’t „round off“ or rather „bevel“ the edges of objects, walls and other assets. This is one of the most important operations when it comes to realism, because no edge is really sharp in the real world, not even the blade of a knife. So… whenever possible, round off the edges and do so on a real scale.
The real Size:
While we’re on the subject… the real scale for your scene is extremely important. On the one hand, the textures work better and on the other hand, in the 3D world it is a norm, so to speak. Because almost every model, whether lamps, sofa or characters, is usually created on a real scale. This standard ensures that if you insert various other people’s models into your scene, they will fit in terms of scale.
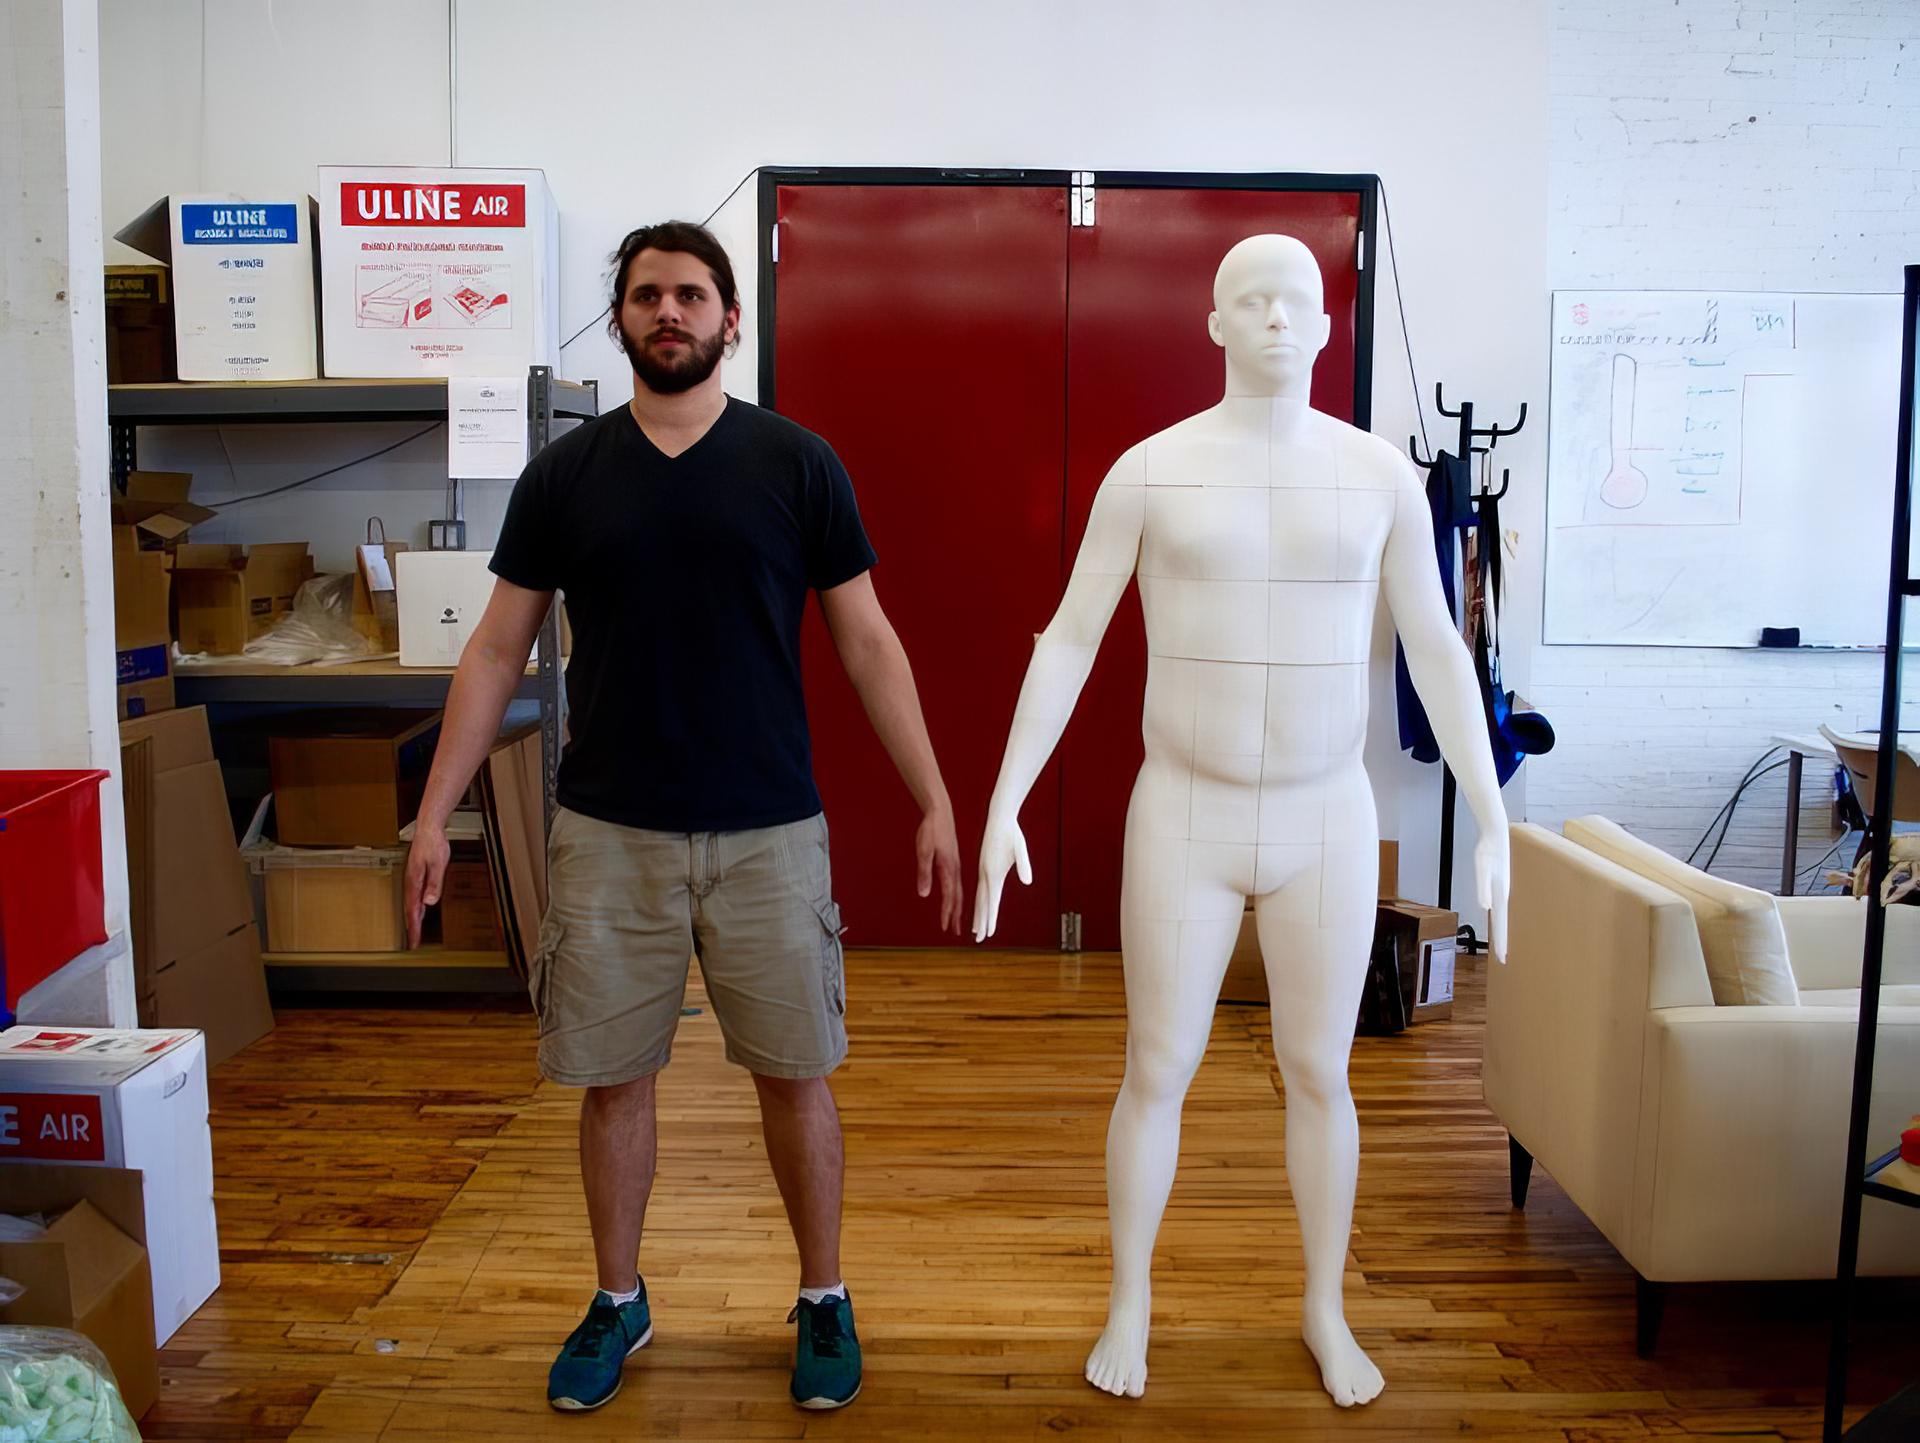
Source: Jonathan Schwartz from Voodoo Manufacturing
Details:
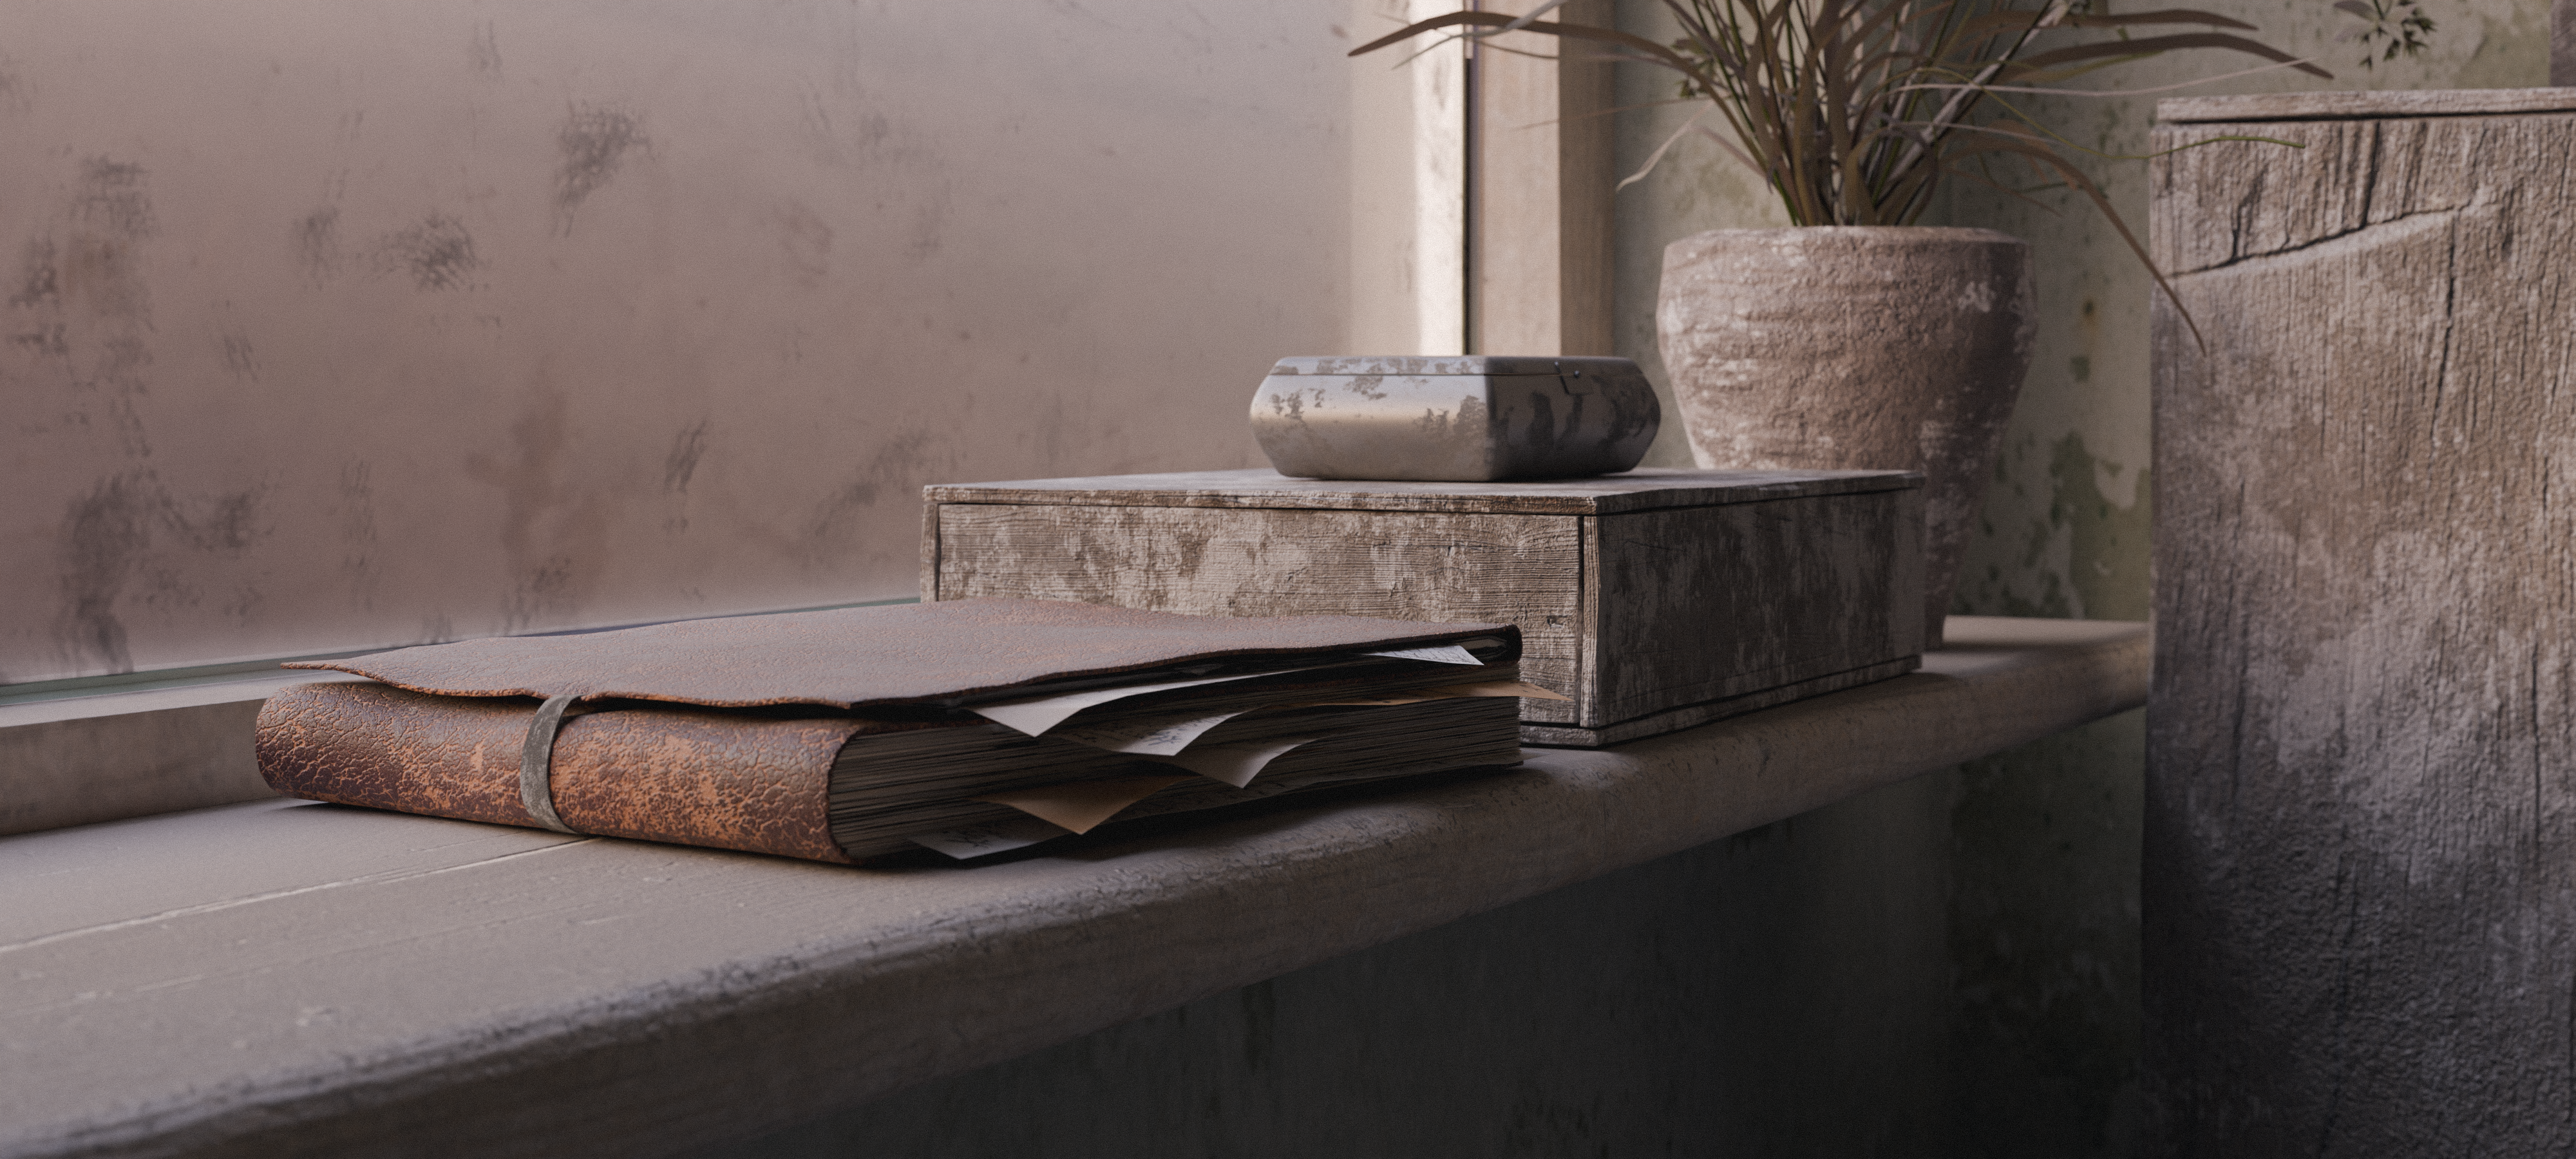
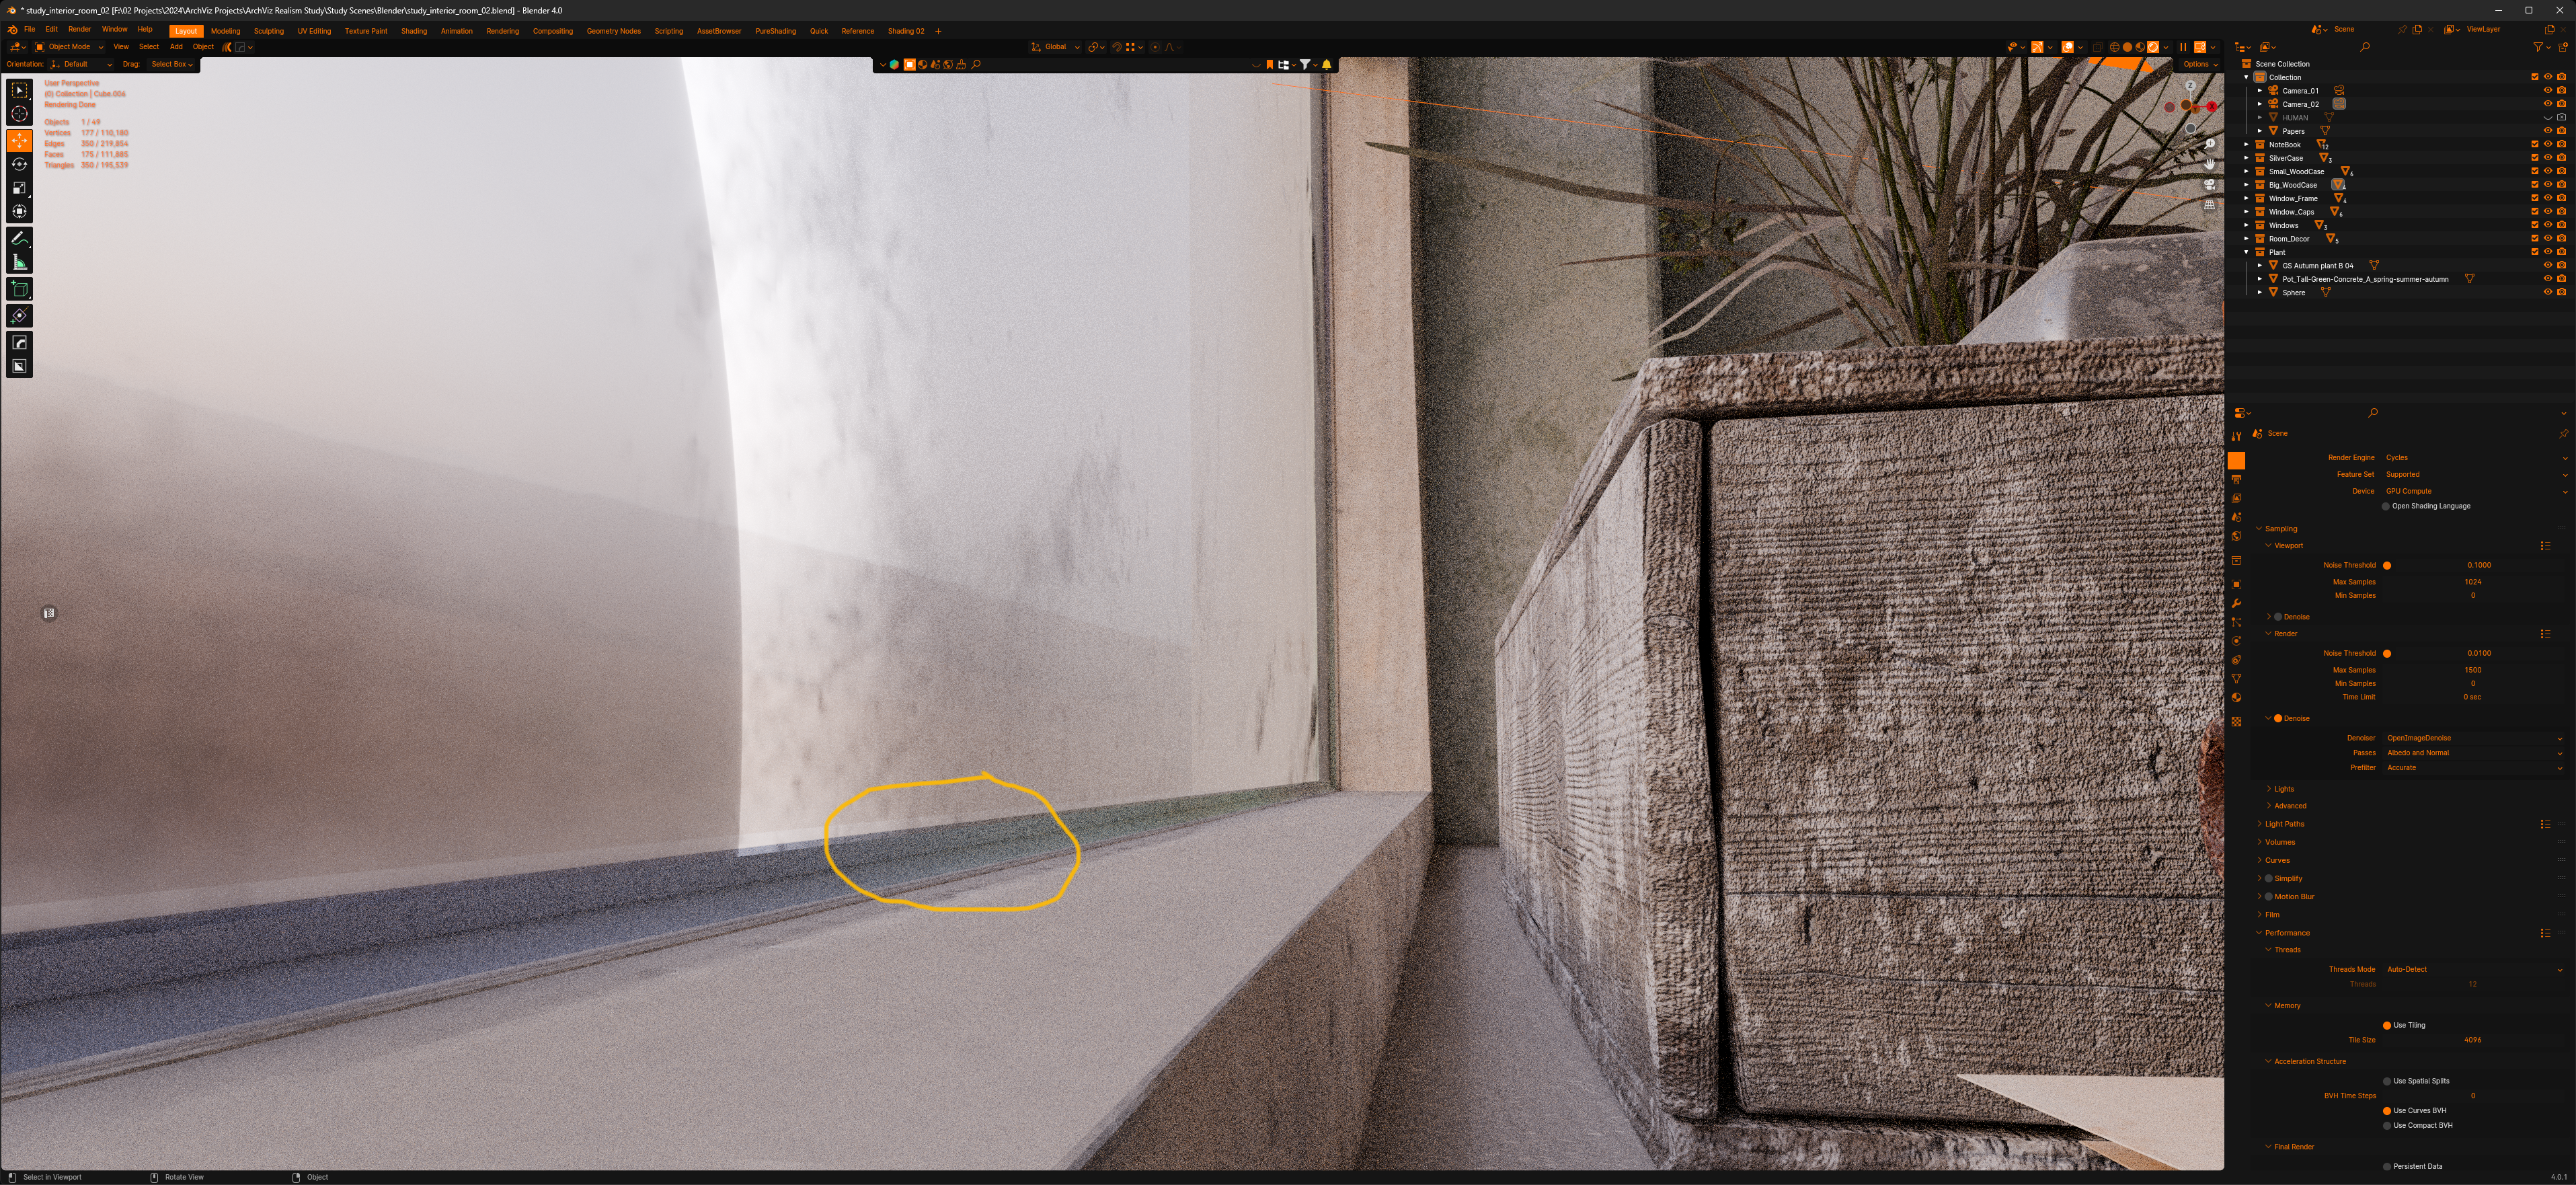
I know it’s easy to get lost in them. But details are hugely important, no matter how insignificant they may seem at first glance. I would like to give you a small example here with my little work. I deliberately modeled a joint on the inside and outside of the window panes and processed it with a noise shader and other settings so that it looks almost realistic. Sure, you might be thinking… what’s the point? No one sees these small, narrow gaps anyway or probably won’t notice them. I also have to mention that I have not yet seen a single rendering where someone has actually applied window joints to the panes. But it’s little details like that that make it complete when you look at it. Many such small details may not carry much weight individually, but together they create the right and coherent overall picture.
Lifting:
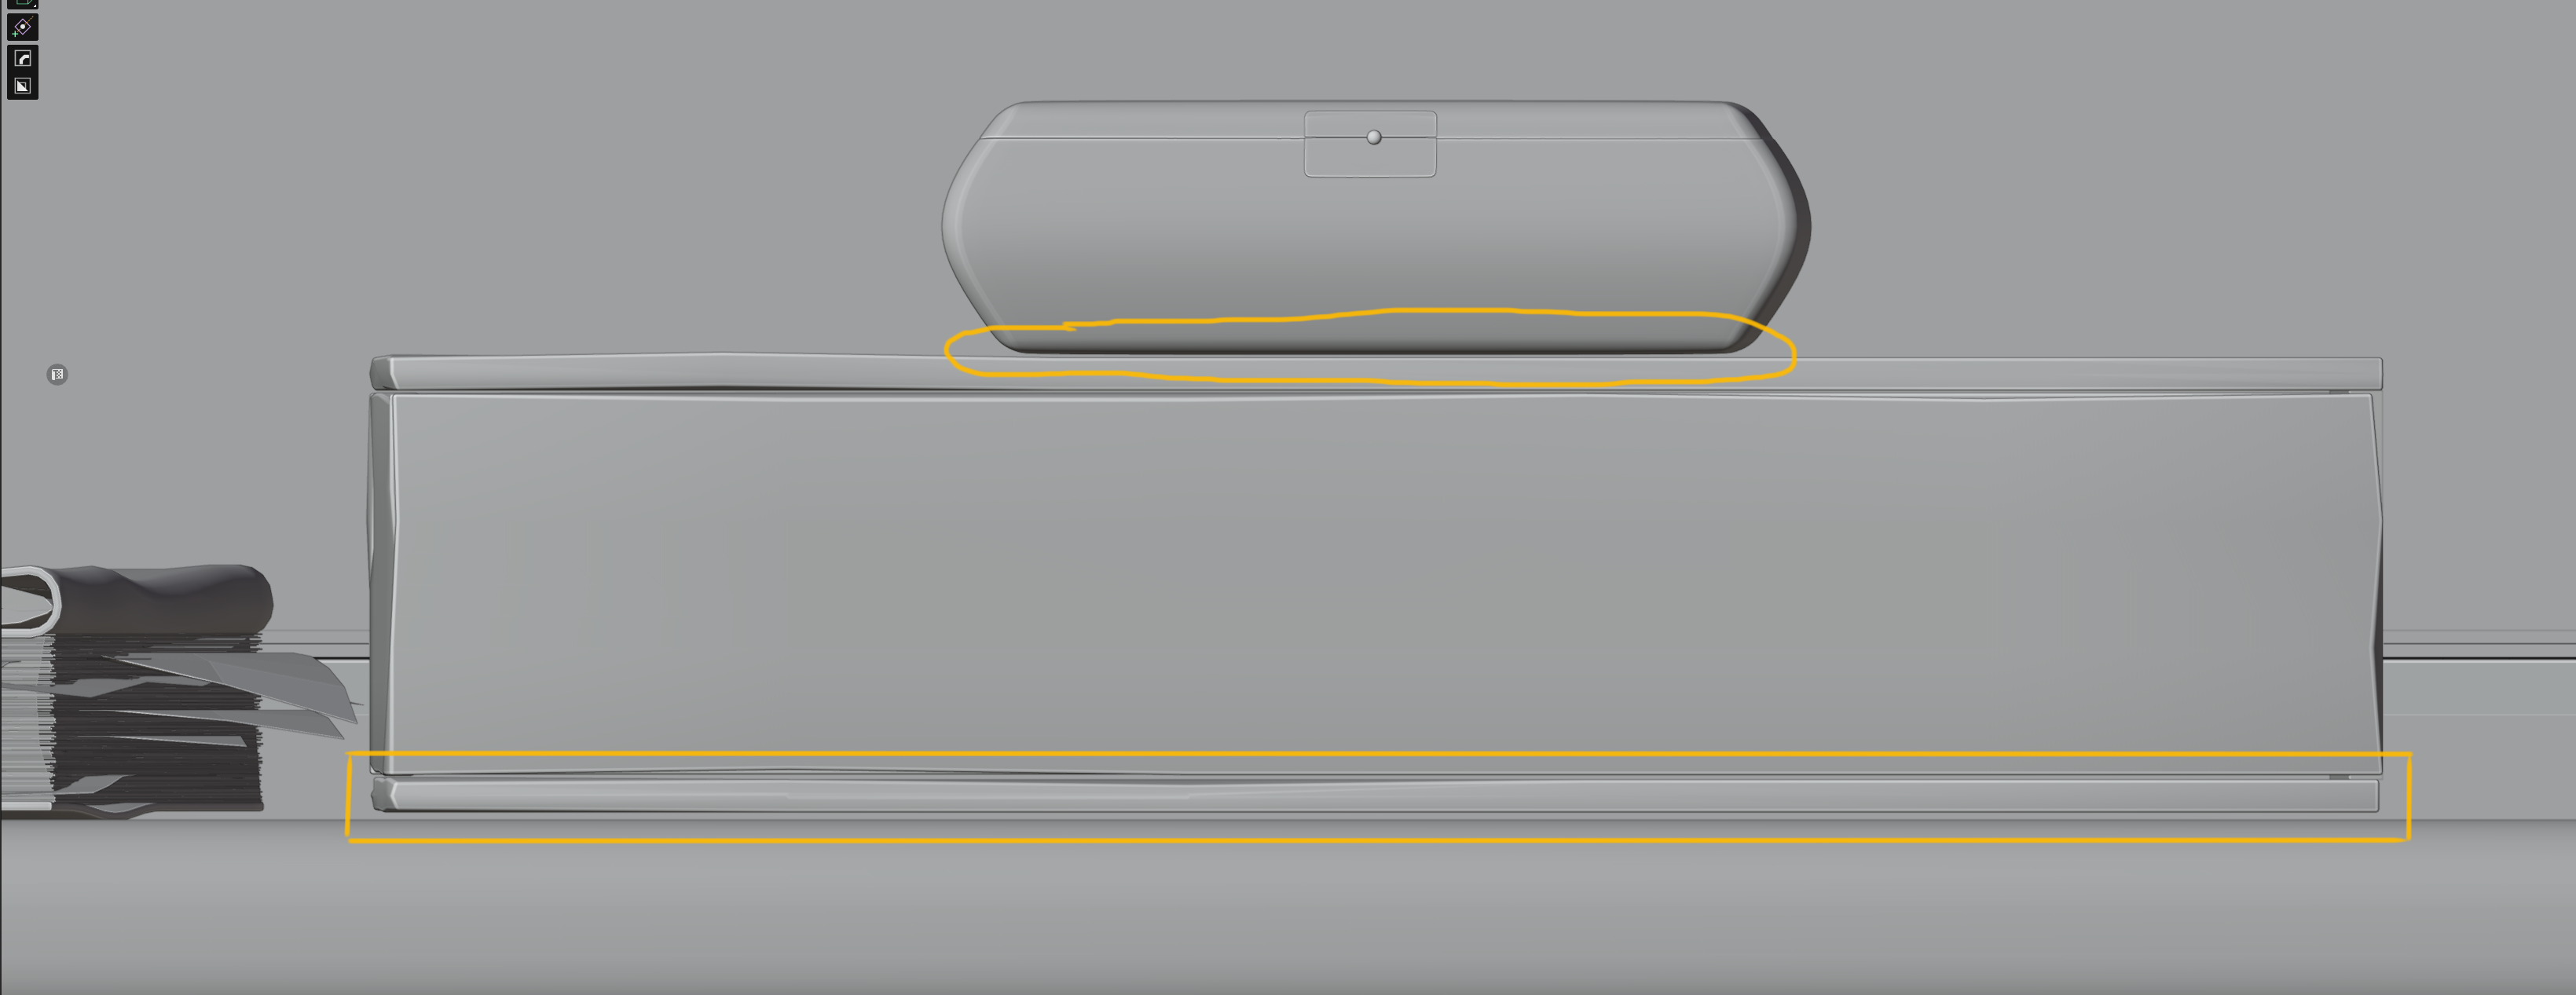
Correct, lifts everything a little off the ground. Only by 2 to 3 mm, no more. It doesn’t matter whether it’s a cup, a ceiling beam or other objects. This not only gives you more details, but also a slight floor shadow, which makes your renderings appear even more realistic. But be careful… you sometimes have to make a differentiated assessment here too.
Gaps, edges and corners:
When modeling a piece of furniture, always make sure that corners, for example, are slightly different horizontally and vertically and are not parallel to each other. The same applies to edges. Sometimes a small shift is enough to increase the realism. Also try to add small dents to the edges, even if you can only see them when you zoom in on your renderings. Always think about the overall picture.
References:
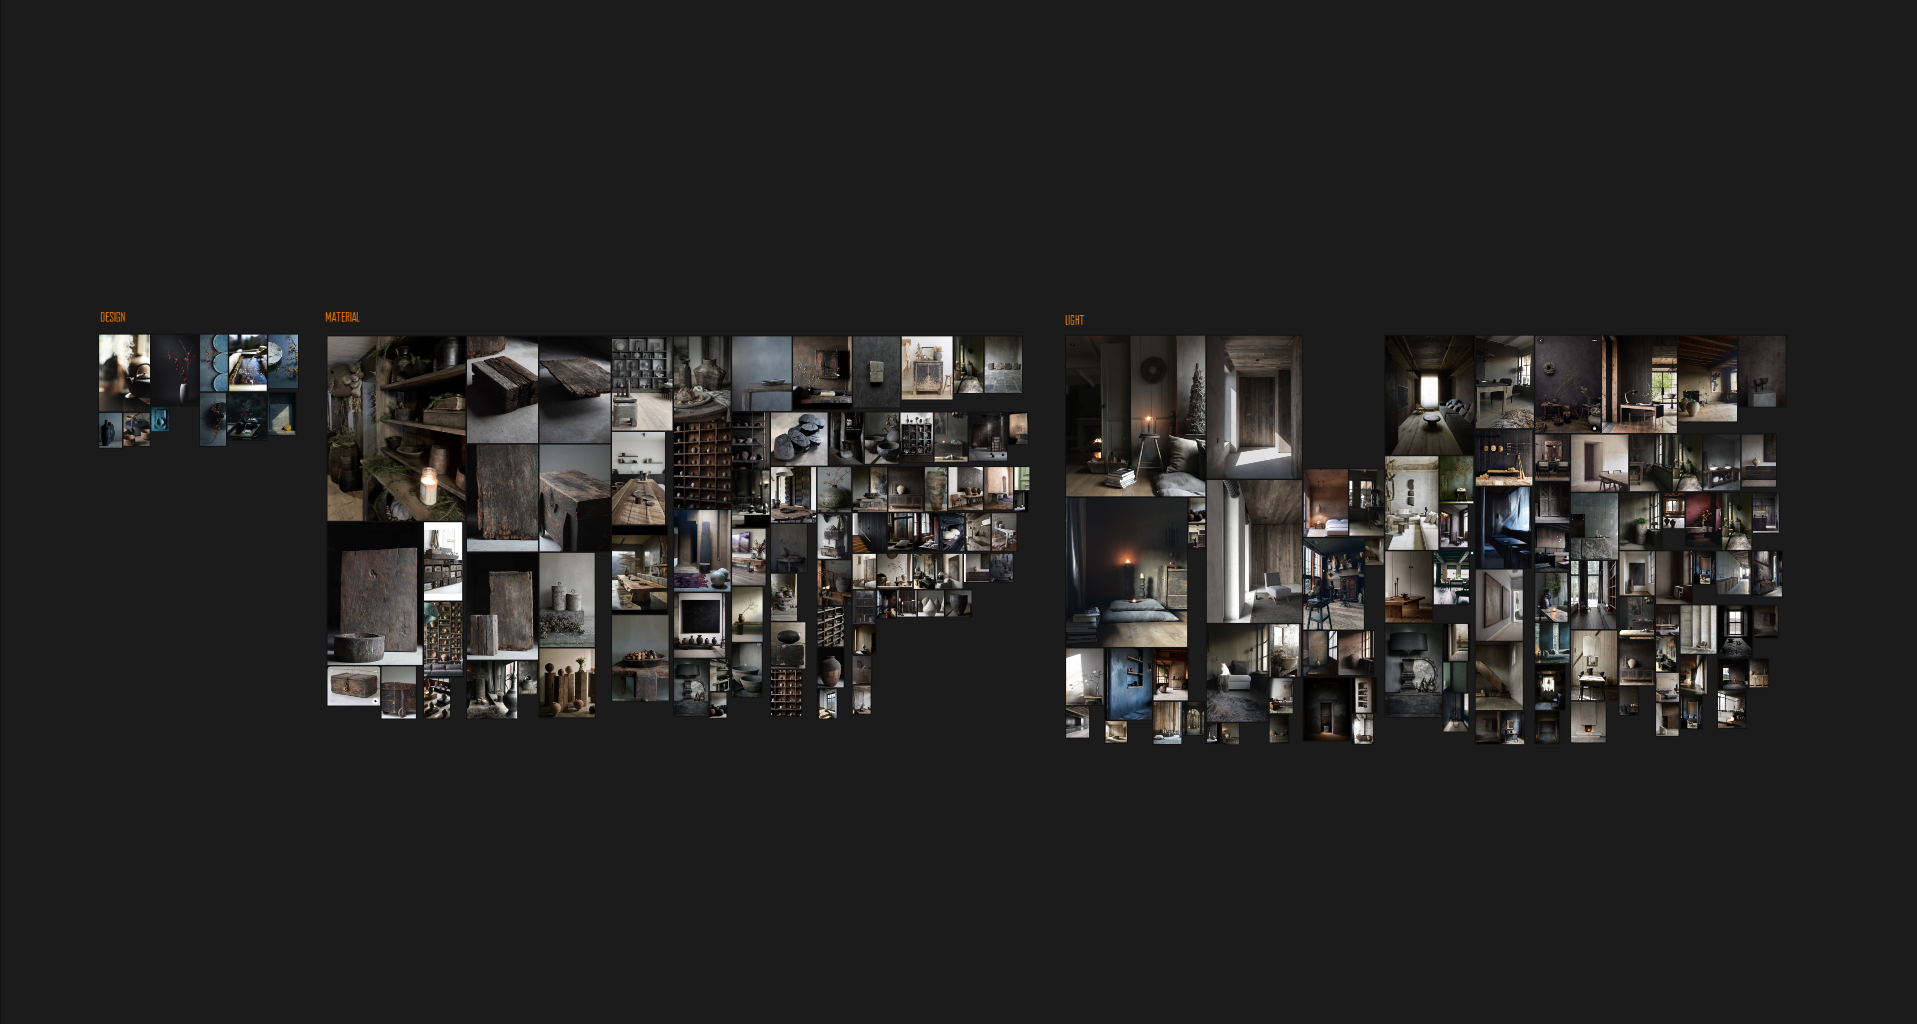
One of the best tips I can give you is to look at real references. Not 3D visualizations, but real photos of real rooms, buildings, objects. I can highly recommend Pinterest for this. Look at and compare your work side by side with one of the real photos and you’ll be amazed at what you’ll notice and see what’s wrong.
Mirror the image:
Right, mirror your work in your favorite software like Photoshop. I have created a special keyboard shortcut in Photoshop for „Mirror image horizontally“. If you work in your 3D software and scene for a long time, at some point you won’t be able to see a single tree in front of so much forest. Therefore, you should render and mirror your work from time to time and you will immediately recognize minor and major errors. The eye adapts to what it sees after about 15 minutes, which means that you won’t notice anything after looking at it intensively for a long time. Only when you change the image are the eyes readjusted, so to speak.
So… these were just a few small tips on the subject of realism, there is of course a lot more good advice, but that’s enough for today. I will try to give more tips and tricks in the future, also in the form of various tutorials. Thank you for your time and interest.